Metzican's Dream off-road Teardrop Trailer

metzican

Suspension Lift
Location
Lafaytte, la
I epoxied the roof today.
20150205_143443_zpsfdskvsp4.jpg


Also mounted my pelican case for my water heater.
20150205_161243_zpstpa5cruu.jpg
 

metzican

Suspension Lift
Location
Lafaytte, la
I forgot to post this picture yesterday. This is the before picture.
20150205_094944_zpslrtmsnm7.jpg

After
20150205_143443_zpsfdskvsp4.jpg


So today I did the false floor and subfloor area. Man I think I got high today. Been a while since that has happened. Everything below the blue tap got epoxied to seal it.
20150206_135655_zps79a7thzp.jpg

20150206_135701_zpsuvwxldk7.jpg

20150206_135716_zpsxkndtpgc.jpg

20150206_135720_zpsg3datsrv.jpg

20150206_135725_zpsj0koayjh.jpg


I also did the floor panels.
20150206_135735_zpsuvxs7u3p.jpg

20150206_135739_zpsfmfneftu.jpg


Now I have to work on the galley door tomorrow and do one more drawer. I got the slides in today.
 

metzican

Suspension Lift
Location
Lafaytte, la
Wow these chemicals are getting to me. I have great ventilation too.

So today I created this nice little drawer. I will stain it and varnish it tomorrow.
20150207_153923_zpsv3b5ayub.jpg


It goes here. Right under the fridge slide. Nice place to store utensils and such.
20150207_152424_zpsouiur24r.jpg


Then I put the first coat of varnish on the inside. Tomorrow it's lightly sand and recoat. Probably will coat the galley also. The varnish helps lesson some of the stain errors. Not the big one's but all the lighter variances.
20150207_152438_zpsfczuiswd.jpg

20150207_152446_zpsuk9obg2s.jpg

20150207_152451_zpslwgxknir.jpg
 

metzican

Suspension Lift
Location
Lafaytte, la
So more progress and chemicals today.

I setup all the doors and electrical panel hatches onto some makeshift tables.
This is before any change.
20150208_093414_zps6d2xssar.jpg


First coat of varnish on the backside.
20150208_105545_zpsph47xsls.jpg


First coat of varnish on the galley.
20150208_105553_zpstgmrsko8.jpg


Second coat of varnish on the front side. I did two coats back two coats front.
20150208_161730_zps0z7jpgsq.jpg

20150208_161735_zpsjx6hx9dv.jpg

20150208_161742_zpsvznwjl7o.jpg


Second coat on the galley.
20150208_161748_zps3nhihnjk.jpg


Second coat inside besides the floor.
20150208_161801_zpswgmvldgg.jpg


So tomorrow's agenda. More varnish. I'm going to sand the second coat down nice for the third coat. I did primitive sanding between first and second.
 

metzican

Suspension Lift
Location
Lafaytte, la
So today I came up with a future way to mount a table. Ran out of sawhorses to heat up lunch on and came up with this great idea.
20150209_115541_zpslrrgdqop.jpg

20150209_120316_zpshzahli6x.jpg


A lot of these photo's are going to look the same. As I did the same thing.

I sanded down the varnish nicely to smooth it out. And applied layer number 3 & 4 to the backside of everything.
20150209_115550_zpsgy7bllmc.jpg


I also applied layer number 3 to the galley.
20150209_115602_zpsk8z1mvlo.jpg


Layer number 3 to the inside and layer number 2 to the floor. That finished up the first gallon of varnish (120 dollars)
20150209_135711_zpsshthxa7a.jpg

20150209_135719_zpse6fog72i.jpg

20150209_135726_zpsgokxtfh7.jpg


I finally sanded down the third rib to be nice and smooth. Along with this I trimed them to proper length and started fitting them. I'm spacing them 3/16" away from the wall to ensure proper fitment.
20150209_164143_zpspmwluu9d.jpg

20150209_164150_zpsdydk2gw6.jpg

20150209_164158_zps64emxuug.jpg


Now the other side.
20150209_165133_zpsp6kvkiqa.jpg


20150209_165140_zpszccdm7zq.jpg


I started cutting out groves in the ribs to fit the cross members.
20150209_175139_zpsvxswrlt7.jpg

20150209_175144_zpspsvshfii.jpg


Hopefully tomorrow I will do layer 4 on galley and inside along with finishing up the frame of the galley hatch.
 

metzican

Suspension Lift
Location
Lafaytte, la
So I put the final coat on the front side of all the doors and electrical panel.
20150210_100521_zps91v6kwok.jpg

20150210_100527_zpsjyzaszhn.jpg

20150210_100535_zpshs8umzj5.jpg


I also put the 4th coat onto the galley. Tomorrow is sand it down and then the final coat.
20150210_100539_zpsk0aaivhn.jpg


I also cut the rest of the groves into the outer two ribs for the cross members.
20150210_100539_zpsk0aaivhn.jpg


Next I clamped these to walls with a spacer to ensure proper closure. Then I cut a 2x4 down to length and fitted it. Next was measuring the angles and cutting it to fit the slop on the top side and bottom.
20150210_143051_zpscrn4j5xi.jpg


After this it was time to fit all the cross members cut them to length and fit them properly inside the groves.
20150210_145237_zpsxxhwiwj4.jpg


It's coming along nicely.
20150210_145241_zps06yhazaq.jpg


I then fitted the next one.
20150210_151408_zpsbii9ue5q.jpg


Here is all three middle cross members fitted.
20150210_155004_zpsajfeoal9.jpg


Then using a 3/4" plywood peace I created the bottom peace. Leaving a small gap for adjustment and to make sure it can open.
20150210_170816_zpsjqbspscg.jpg


Tomorrow I will fit the middle rib.
20150210_170821_zpsvwkuewke.jpg


I also sanded down the interior have to clean it extremely well tomorrow when my clothes are not covered in sawdust and dirt. Then I will put on the final coat.
20150210_145427_zpsw72bj9dd.jpg

20150210_145441_zpszw3ei2vt.jpg

20150210_145446_zpszdrf7shn.jpg
 

metzican

Suspension Lift
Location
Lafaytte, la
More updates to the galley hatch.

I cut the grove for the middle rib on the bottom cross member with my router.
20150211_124912_zpsj9mgyw1r.jpg


The middle cross members cut down with a jigsaw.
20150211_124917_zpszm6f1fyk.jpg


What it looks like looking down them all.
20150211_124924_zpsfuxzkw9z.jpg


The middle rib in place clamped and glued. No screws or nails needed on this whole thing.
20150211_164815_zpshpwwfqph.jpg


Top cross member was grooved too with the router and here it is clamped and grooved.
20150211_165214_zpsmia5zt8y.jpg


The middle rib was also grooved out to fit the middle cross members for a nice crisscross joint. Here it is glued together.
20150211_180751_zpsvnvidhyi.jpg

20150211_180757_zpsfglwvu9w.jpg


The whole rear galley frame. I just hope it is strong enough not to snap when the plywood is applied. This is a known issue.
20150211_180804_zpsvehytkhg.jpg

20150211_180816_zpsiydzwpat.jpg

20150211_180831_zpsp1bp2hgs.jpg


I put the final coat on the inside of varnish after cleaning it all up from sanding it yesterday. Sanded with 220 grit paper and then cleaned up with a rag and water.
20150211_180430_zpsc1h6a6zb.jpg

20150211_180433_zpsercbsgqd.jpg

20150211_180441_zpsejkgjbxe.jpg


Here is the floor panels with a thick coat of varnish applied to one side.
20150211_180728_zps7fm1uzw5.jpg

20150211_180737_zpsyy66sbzh.jpg
 

metzican

Suspension Lift
Location
Lafaytte, la
So today I had a fun meeting at work. About 20% employee cuts. I still got my job! But everyone else took a 10-25% pay cut. I took about a 20% pay cut. Yeah!!! This is perfect timing as I'm trying to save majorly for this trip. Might get delayed 1 month so I can compensate for the money.

After this great meeting. I decided to do some sanding is all I got done. Sanded down the galley for the last coat of varnish.
20150212_171642_zpskkbw70fw.jpg
 

Timrich

Super Duper Moderator
Founding Member
Location
Central FL
Have you thought of soaking the plywood in water before putting it on the rear galley frame? That will make it more "ply"able. (See what I did there?)
 

metzican

Suspension Lift
Location
Lafaytte, la
Have you thought of soaking the plywood in water before putting it on the rear galley frame? That will make it more "ply"able. (See what I did there?)

Yes I have but it will also weaken it and help it separate down the line in the future. I may do a wet cloth on one side though.
 

Timrich

Super Duper Moderator
Founding Member
Location
Central FL
Ahhh ok. I didn't realize it would cause separation. I figured you had researched enough to have thought of it.
 

metzican

Suspension Lift
Location
Lafaytte, la
Ahhh ok. I didn't realize it would cause separation. I figured you had researched enough to have thought of it.

If you soak nowadays plywood in water or leave it out in rain it will seperate in a 1-4weeks, Old plywood would take years. Just shows the cheapness of the plywood these days. Yes you can still buy the premium stuff that will last longer but you will pay the money. This is why it is so important to seal everything as water tight as possible. Most people use 1/8" for skinning well I could not find any so I used 1/4" well this adds a lot more stress while bending. What I will end up doing is doing it over a few days. Let the wood stretch and bend as you go vs trying to crank it down over a day.

Looking good man!

Thanks man.
 

drbandkgb

Titan Swapped / SAS'd
Founding Member
Looks great sir..

People can SAS rigs and such and it takes some skills.. This is next level skills...
Total respect amigo

Oh and gas prices are going back up so I expect you will be back to full pay soon ;)
 

metzican

Suspension Lift
Location
Lafaytte, la
So today was good, got to finish up some more parts of the project.

I put on the last coat of varnish on the kitchen. Before I did this I had to clean up all the dust from sanding yesterday.
20150213_120529_zpsnxsuo2kl.jpg

20150213_155048_zps6kfkw54p.jpg


I also put the final coat on the subfloor cutouts. I already did the top side so I did the bottom side today.
20150213_155034_zpsblfg2meh.jpg

20150213_155039_zpse3nucuwc.jpg


Tomorrow will be skinning the galley hatch hopefully. Besides this might start working on all the electrical stuff on the inside and galley.
 

01XterraPhilly

First Fill-Up (of many)
Location
Conshohocken, PA
This is coming along awesomely. How in the heck did you get the storage unit company to let you work there? A lot of places these days won't let you do any sort of work in the units or on the property
 

metzican

Suspension Lift
Location
Lafaytte, la
This is coming along awesomely. How in the heck did you get the storage unit company to let you work there? A lot of places these days won't let you do any sort of work in the units or on the property

Wondered that myself.


Sent from my iPhone using Tapatalk

To sum it up. I called every storage unit area in a 30mile radius. This one runs a little different. They only have about 30 of these small units. Then they have about 100+ of units that are 15' wide, 20' high, and 30-100' deep. They lease or sell these larger units. They actually want to tear down the small ones. They don't keep track of them at all. People just come in and store stuff and lock there stuff out and maybe 4 months down the line you will see a red padlock on it. They bought the storage area a couple weeks before I started renting and had no records of who had what small storage unit. And no one to bill. I just offered to rent one. They said yes. I asked if it had power they said yes. I said i was going to use it as a wood work shop they said yes. I ran into a few that did not care about the workshop but they did not have power. Did not want to run a generator. I also got it written in the lease that this was fine since the original said otherwise. What can I say you gotta look good and smile.
 

01XterraPhilly

First Fill-Up (of many)
Location
Conshohocken, PA
very cool. we had a storage unit that was super expensive...well in my opinion it was...we basically had a closet for like $100 a month. ridiculous to me. but they wouldnt let you do anything of the sort. We did have my wife's old mustang in one but it just sat there until we sold it. i finally got fed up with the increase of price every month and moved my stuff 2 hrs south to my moms house who had a whole upstairs empty. she doesnt go up there so its never in her way. free storage until we get our own place.
 

metzican

Suspension Lift
Location
Lafaytte, la
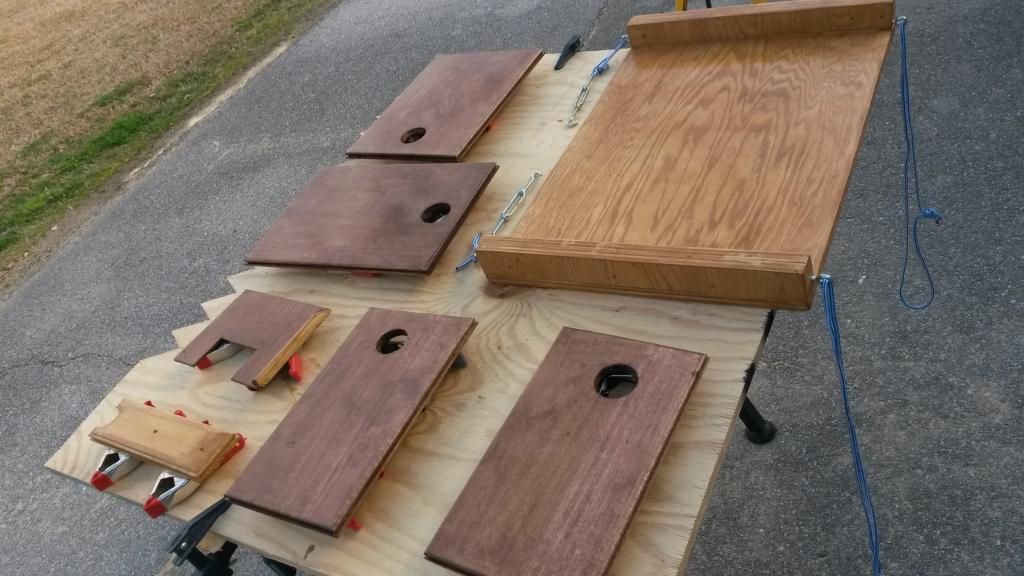
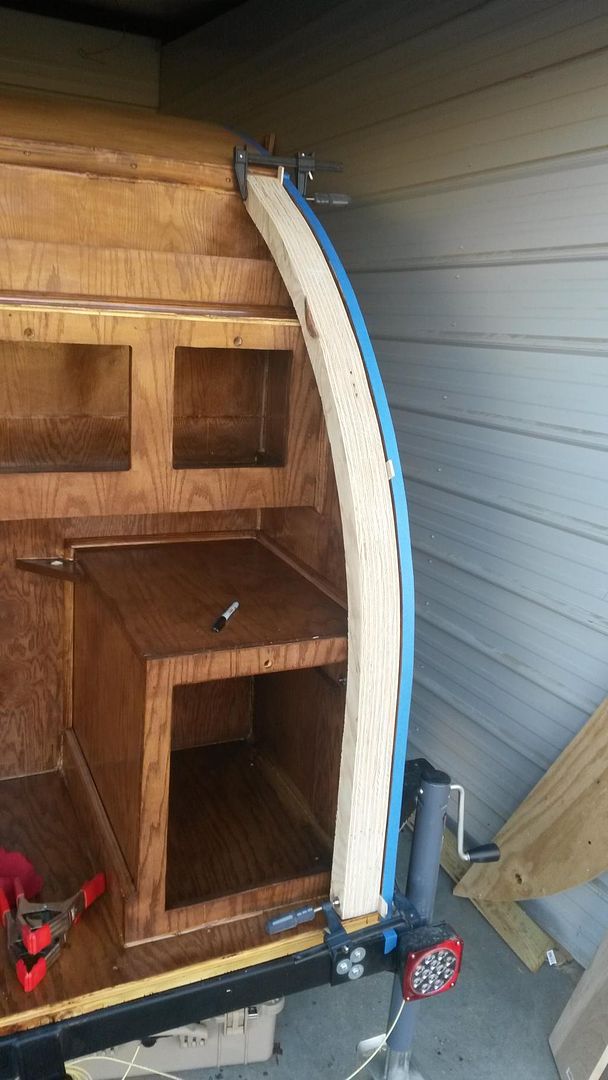
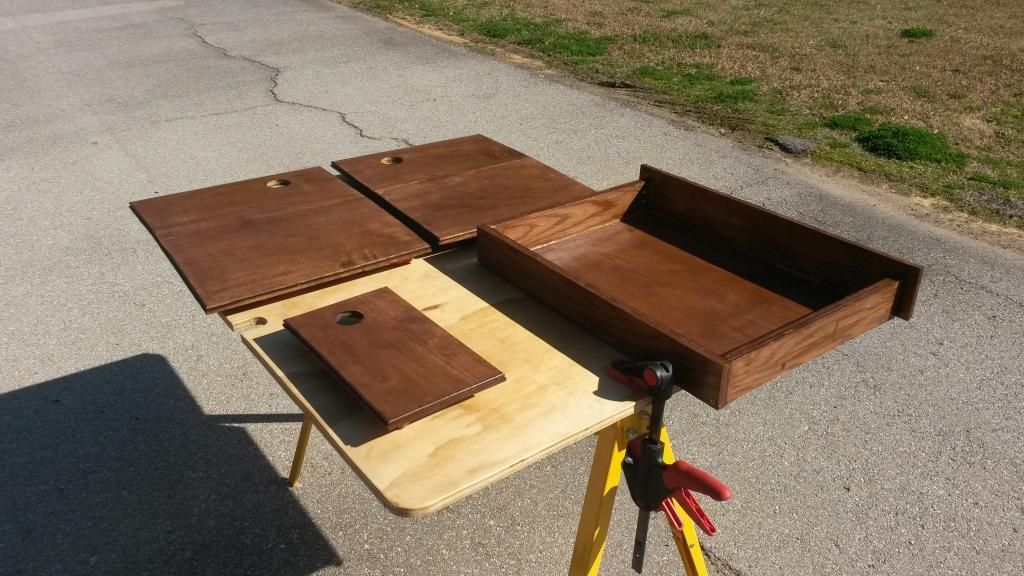
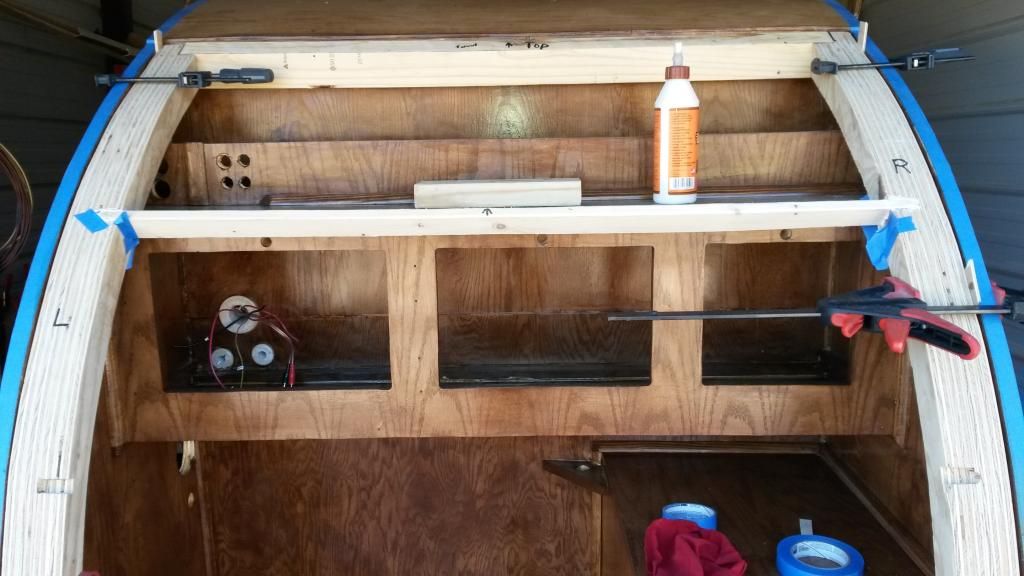
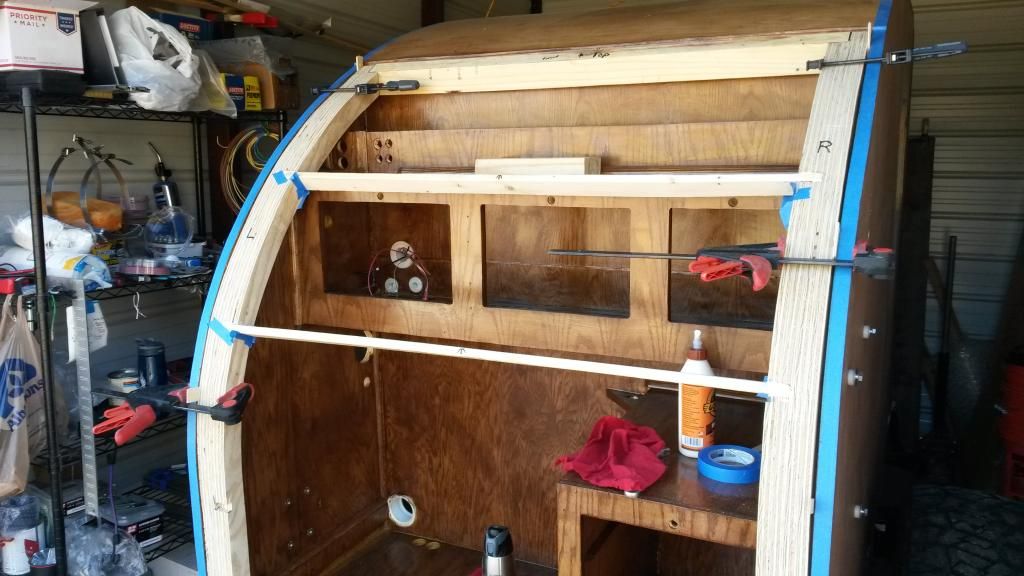
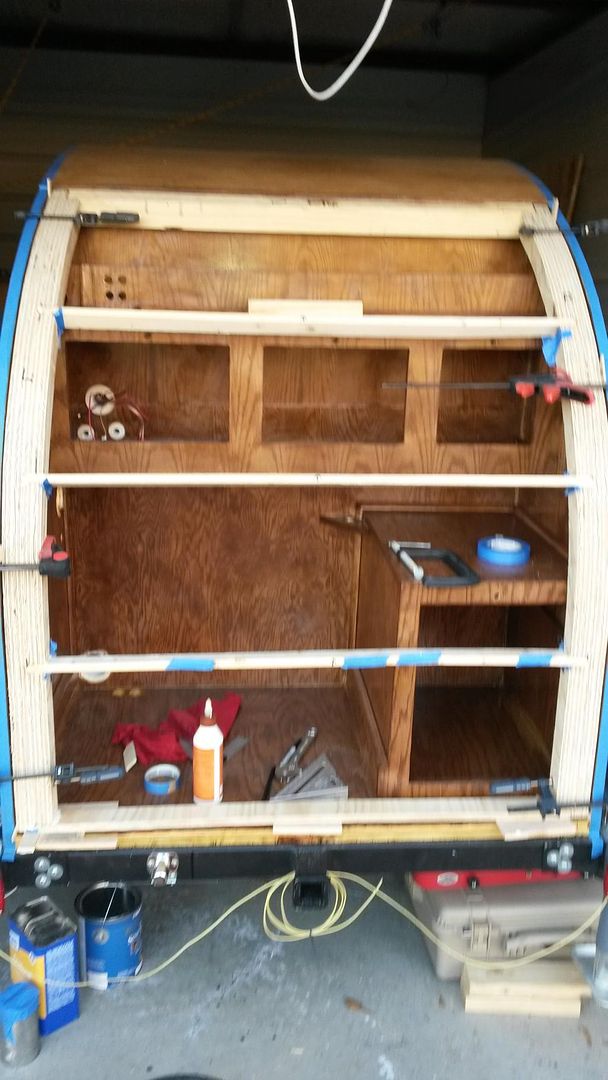
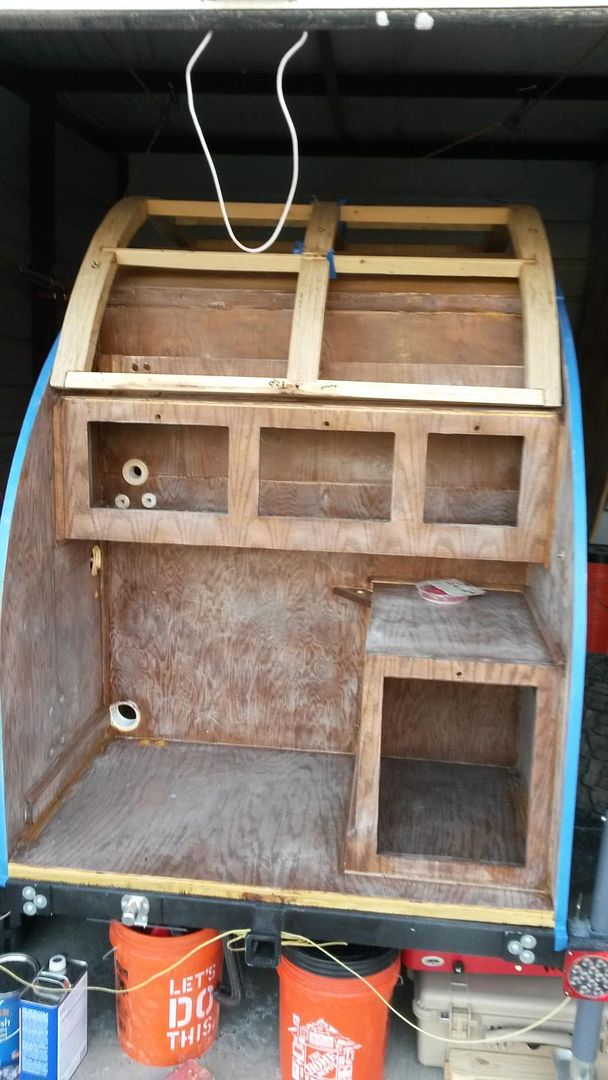
So today's project try to start putting it together since the insides are all done.

So I started assembling the inside with all the accessories. Wow what a pain in my ass sitting on that hard wood all day.

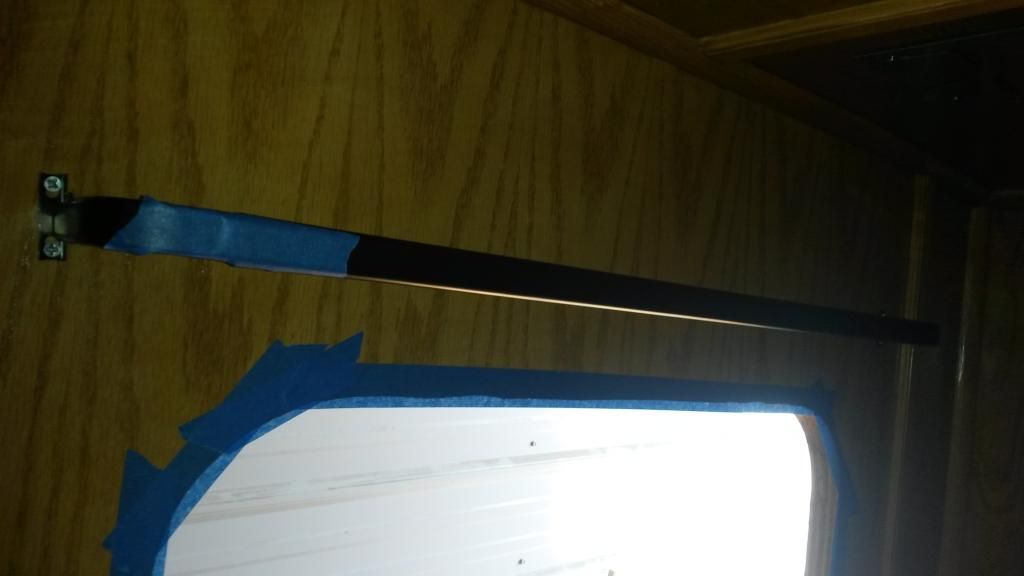
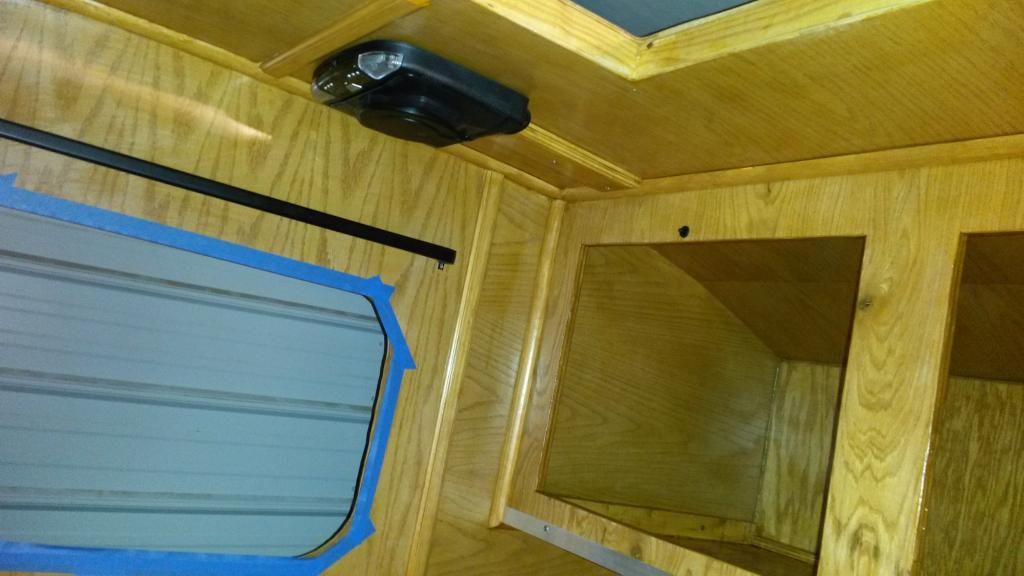
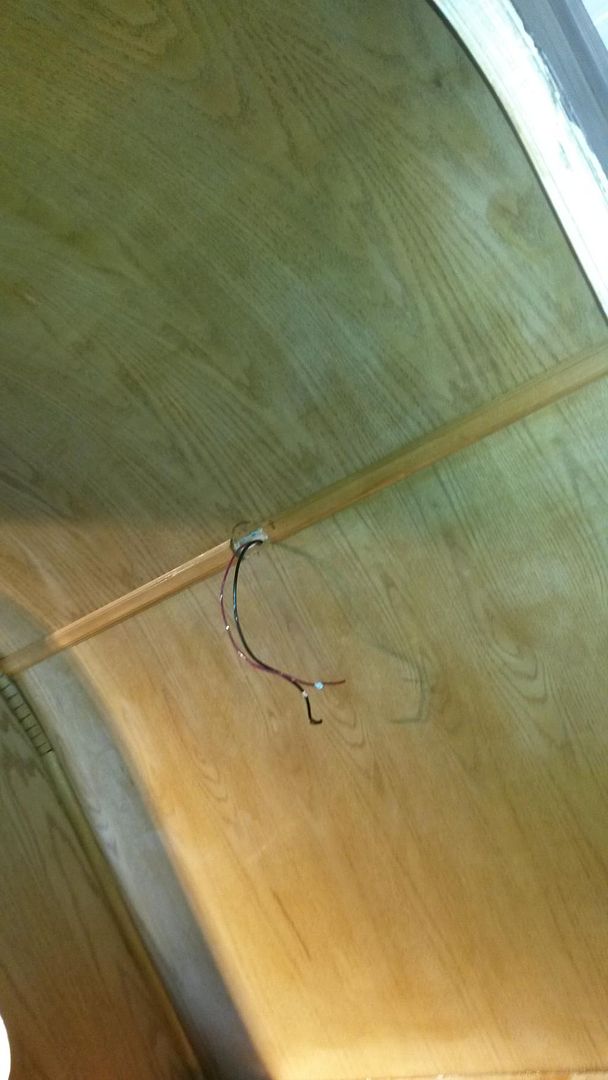
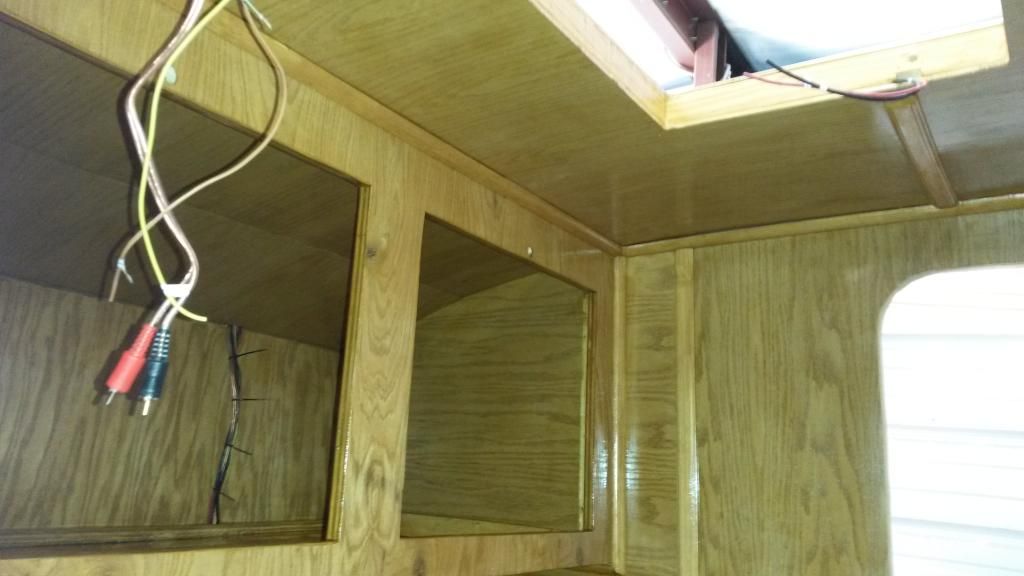
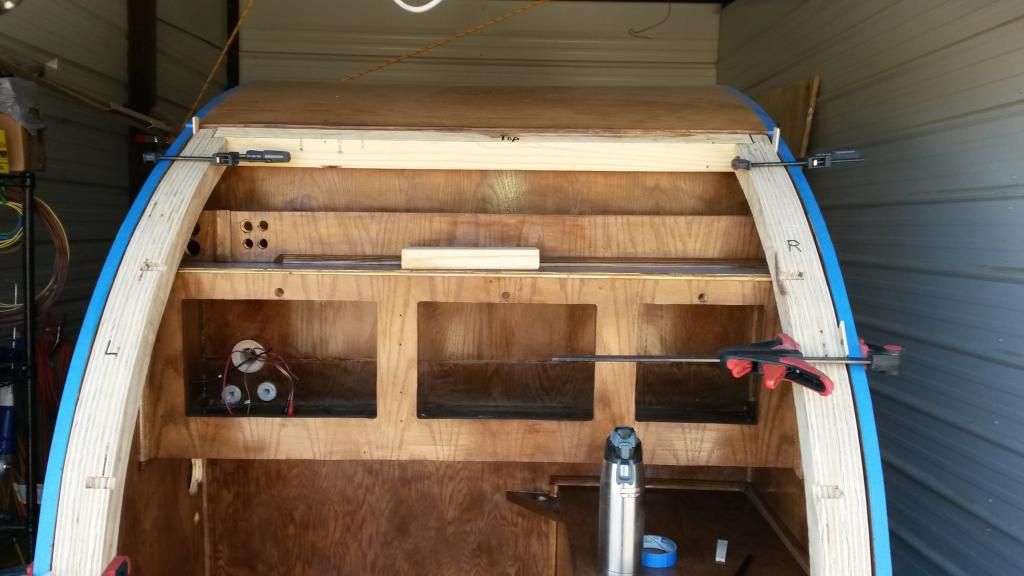
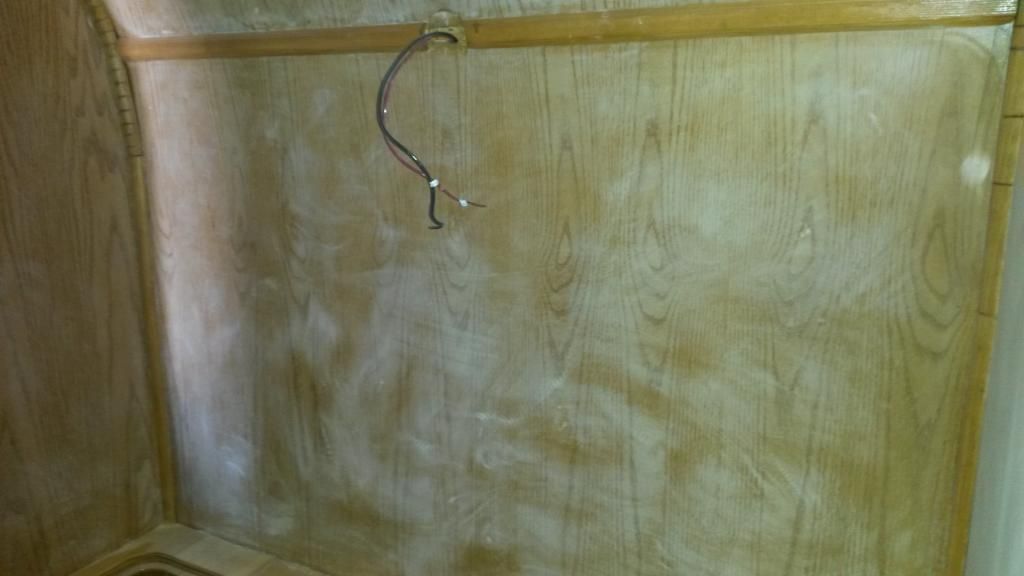
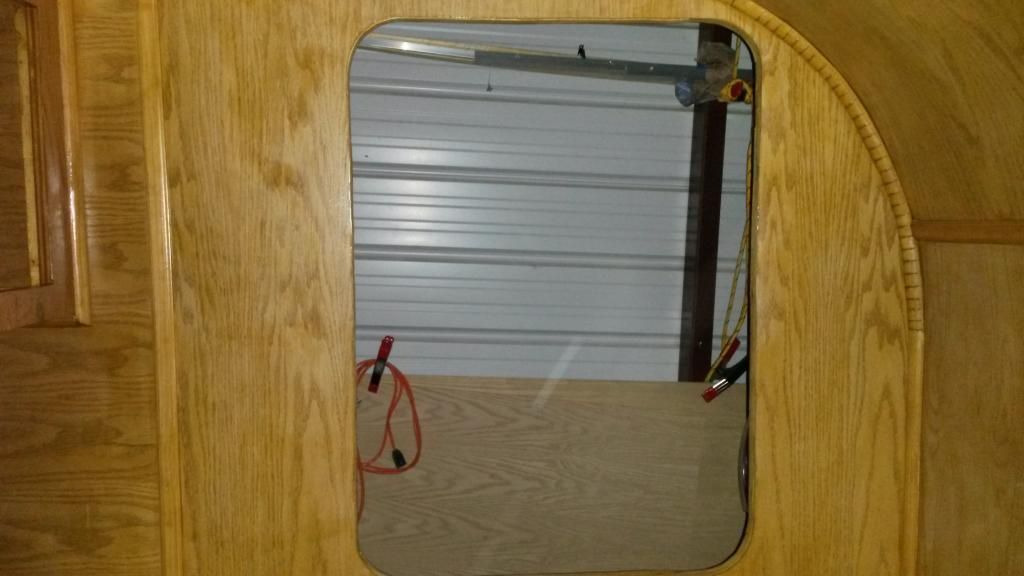
Mounted up the curtain rod above the window area. Still have to make the curtain. And Mount the rod above the door area too.
20150214_094859_zpstfzgnke6.jpg


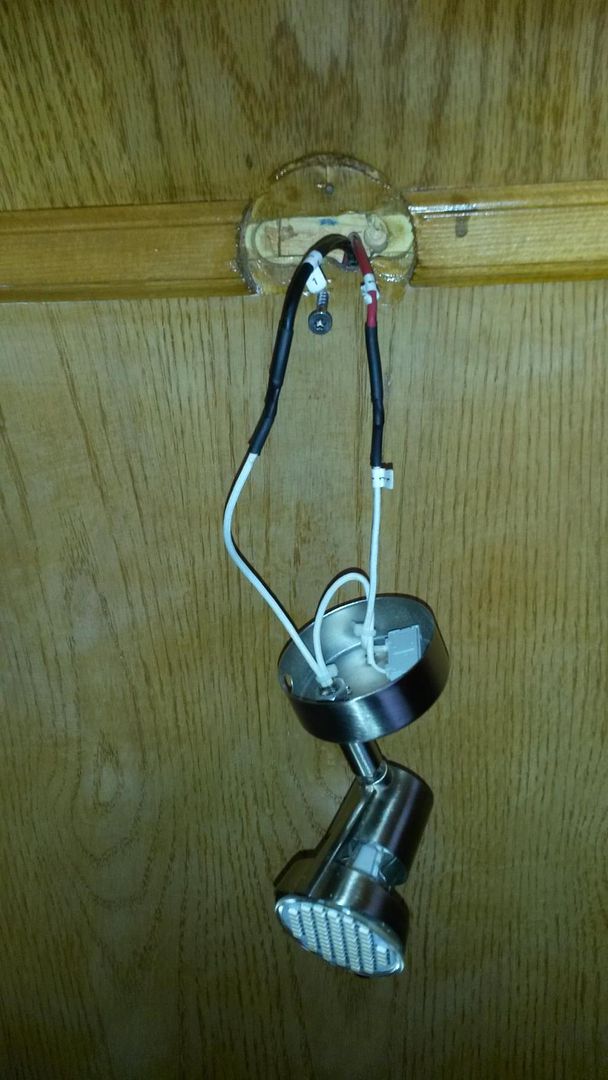
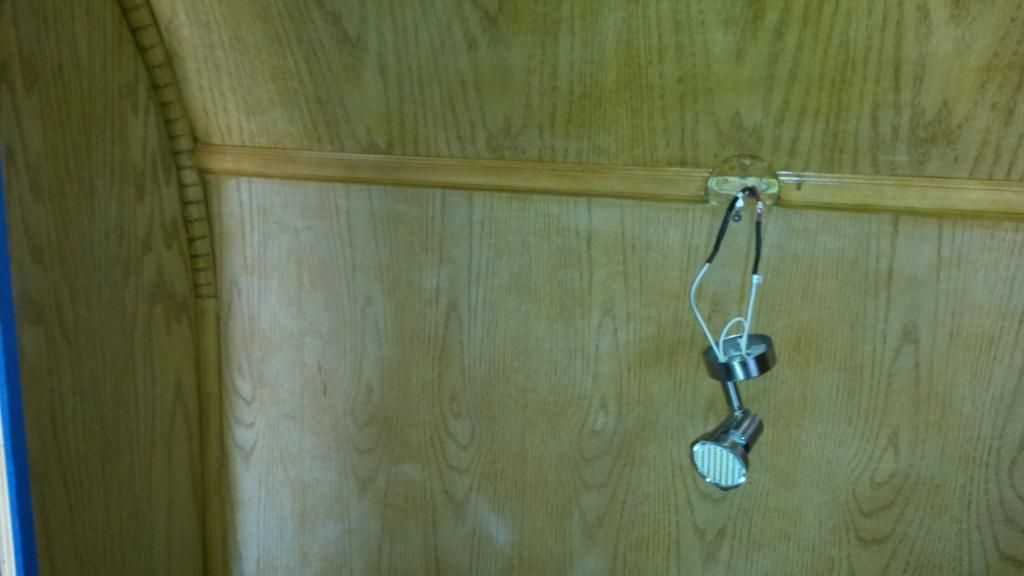
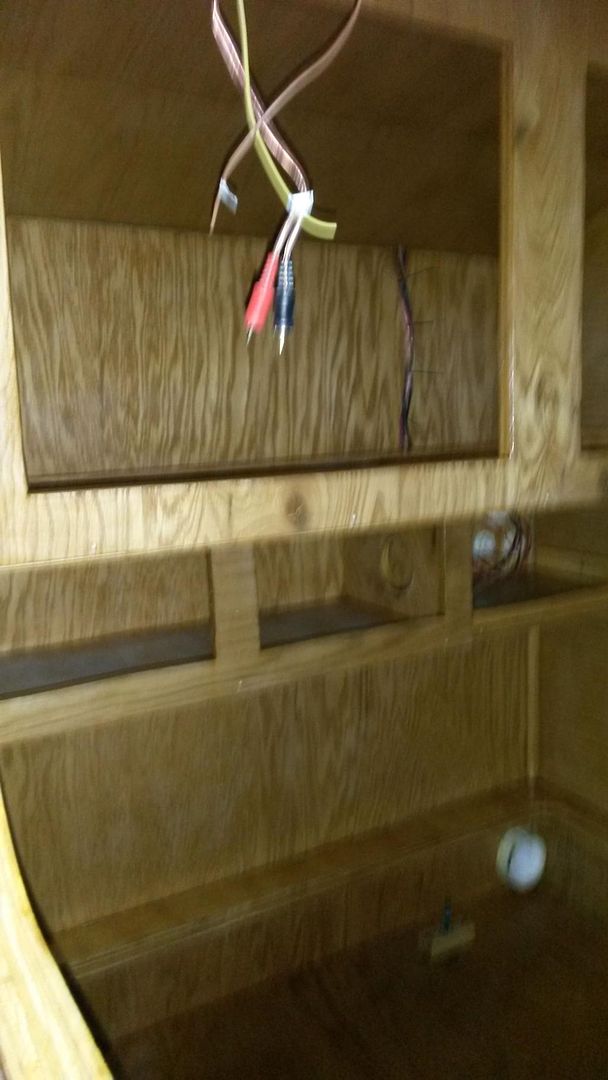
I soldered up the wiring for the reading light.
20150214_110619_zpspazcypp7.jpg

20150214_110627_zps7a8p6lpl.jpg


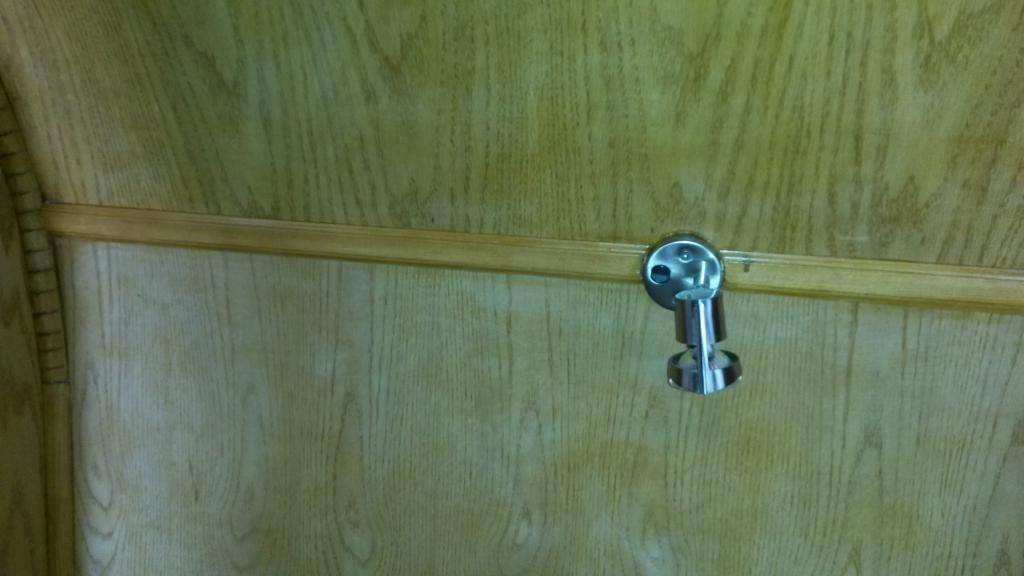
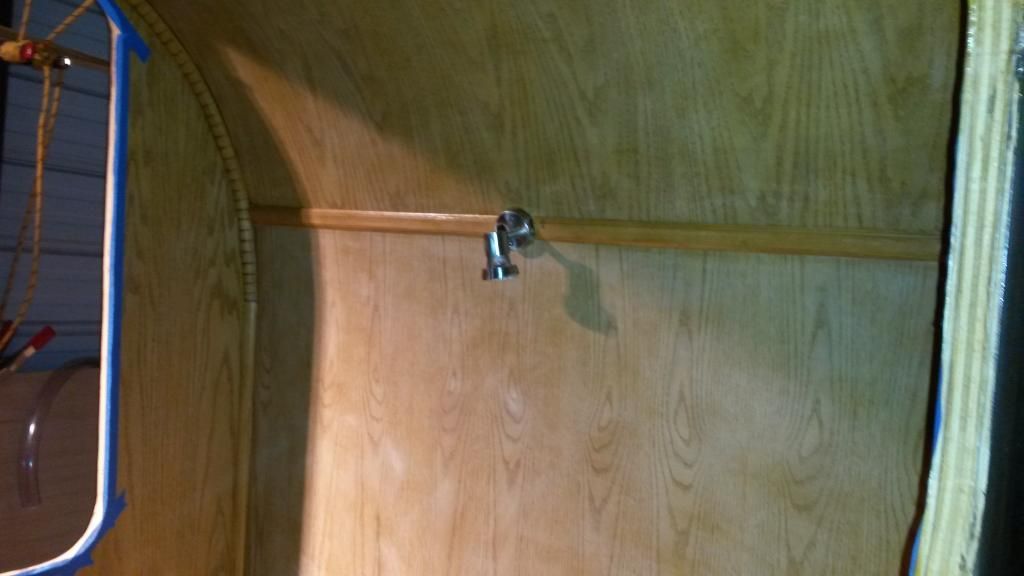
Then I mounted it up.
20150214_110850_zpsgbdb3uew.jpg

20150214_195354_zpsv5httndo.jpg


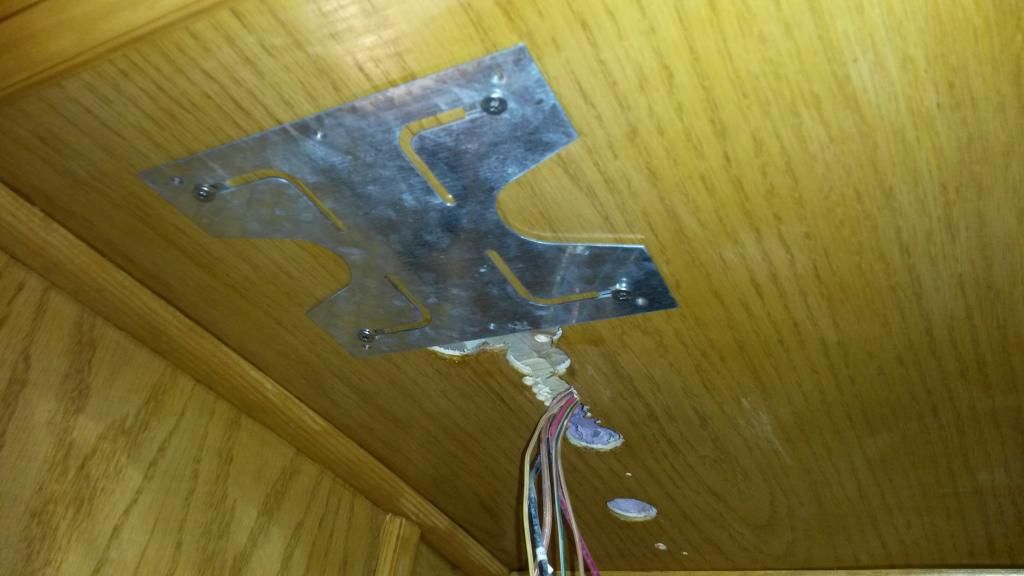
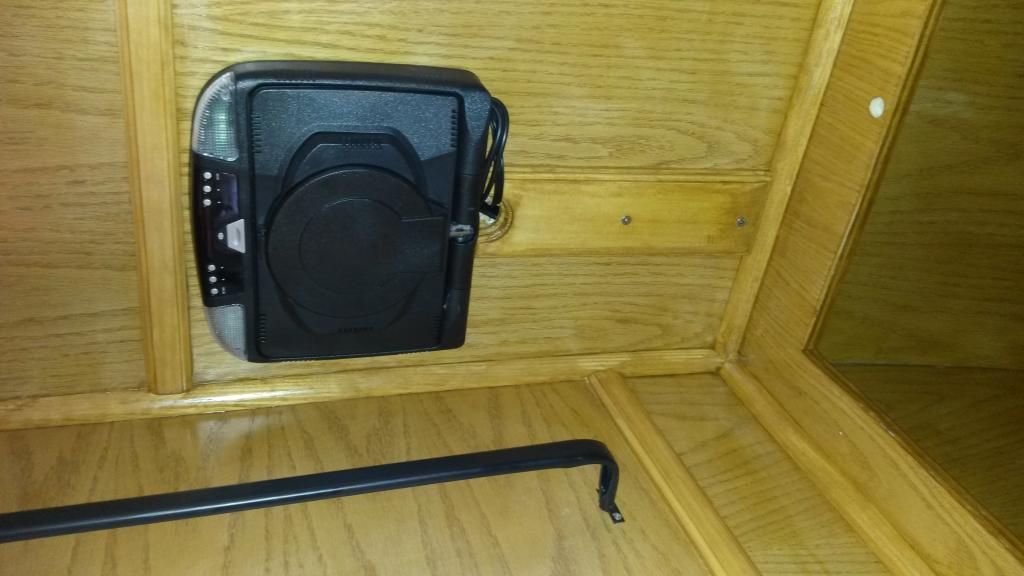
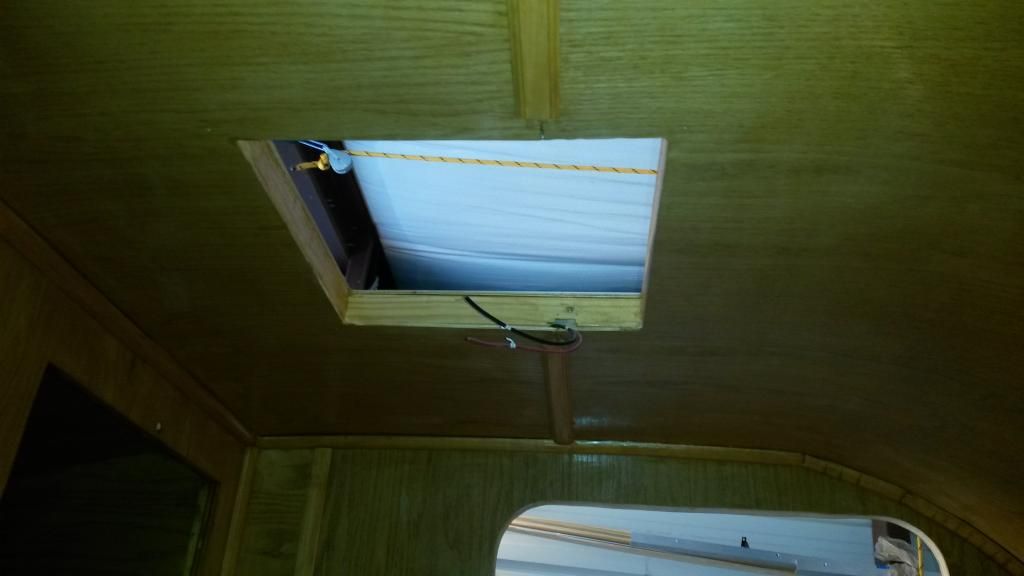
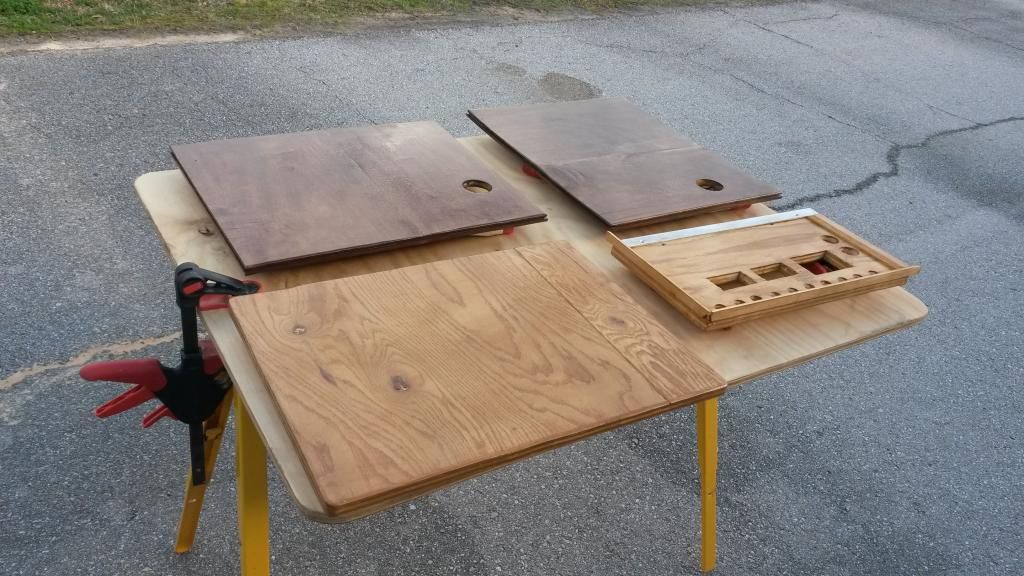
I then mounted up the plate to hold the DVD player.
20150214_094904_zpsbm6ff587.jpg


After this I mounted the DVD player. So I could solder up all the wiring.
20150214_110850_zpsgbdb3uew.jpg


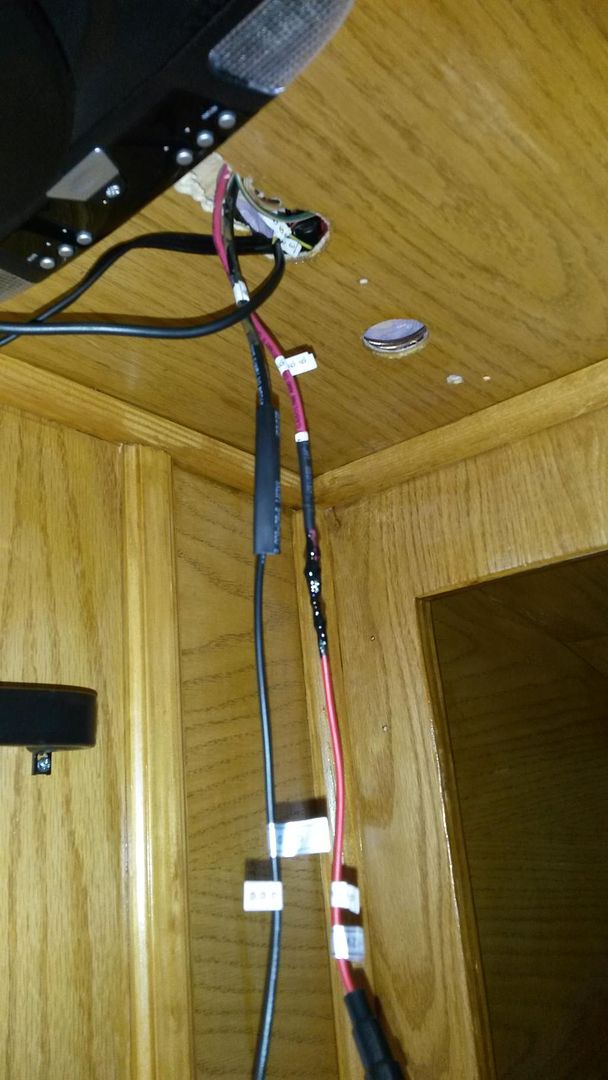
Soldering some wiring. Had to use liquid tape once. GRRR. The rest are heat shrink.
20150214_120451_zpswxvnwriq.jpg


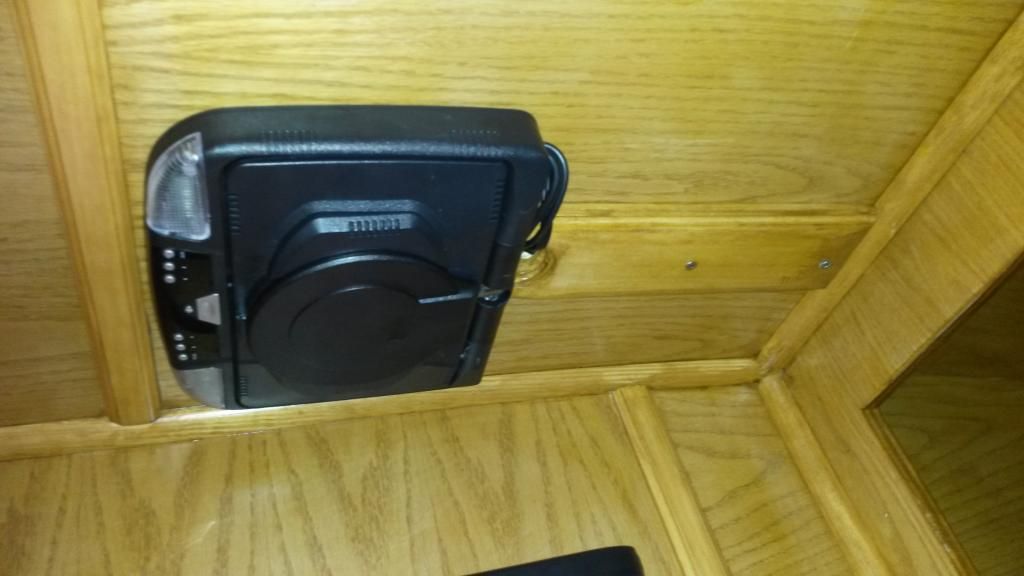
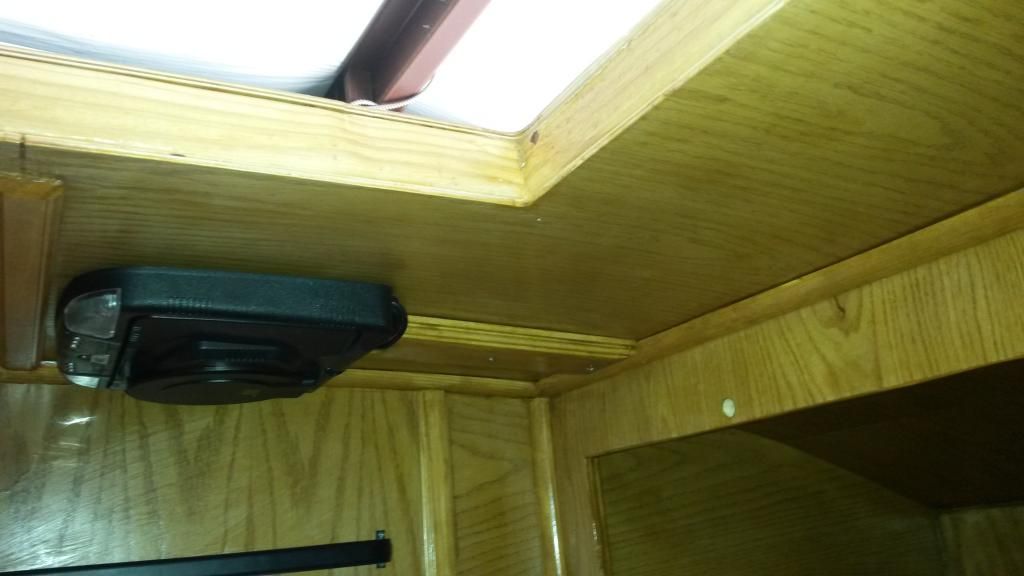
Turned the DVD player around the way it is suppose to be. Then I put up the finishing piece to make it all look nice.
20150214_124947_zpsijycbday.jpg

20150214_124957_zpsjenc60b2.jpg

20150214_125005_zpsbcg3s3r4.jpg

20150214_195434_zpskgxfbaht.jpg


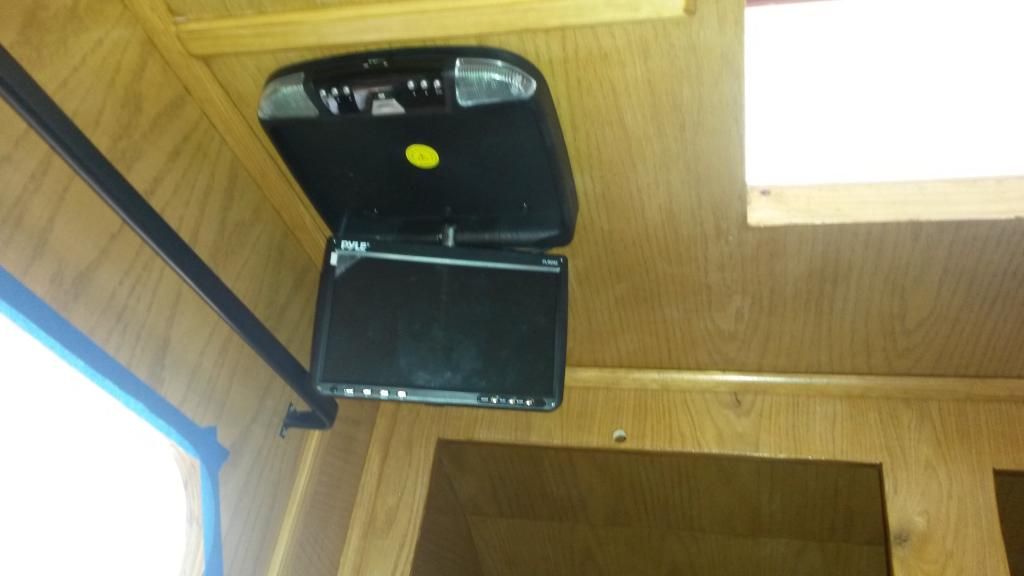
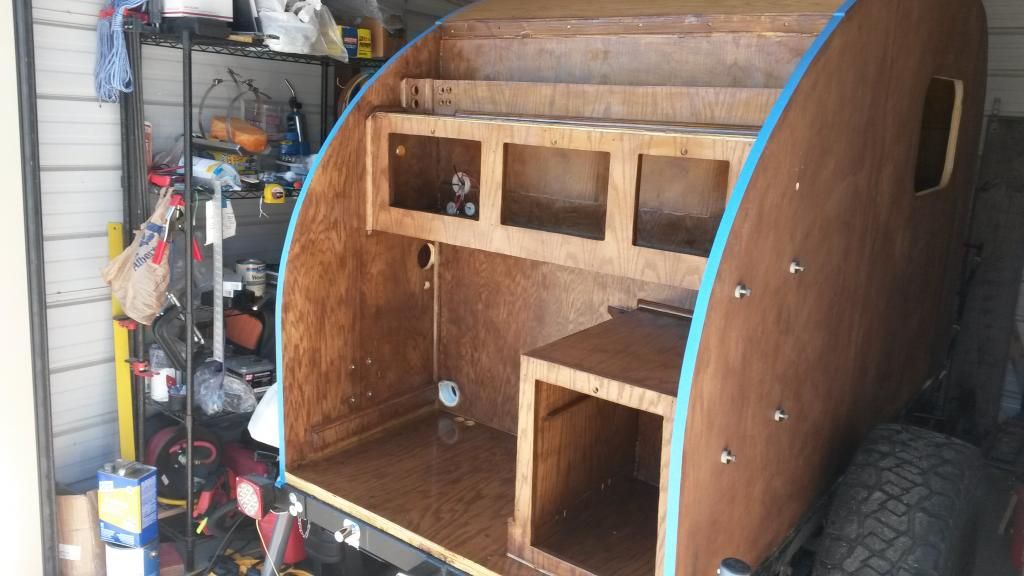
What it will look like open.
20150214_125018_zpsazpny3k1.jpg


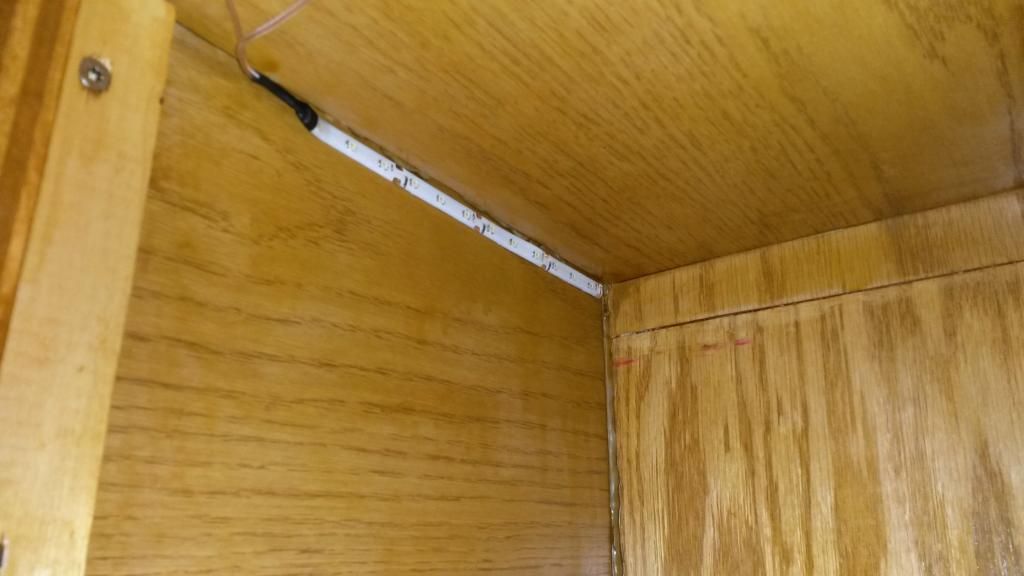
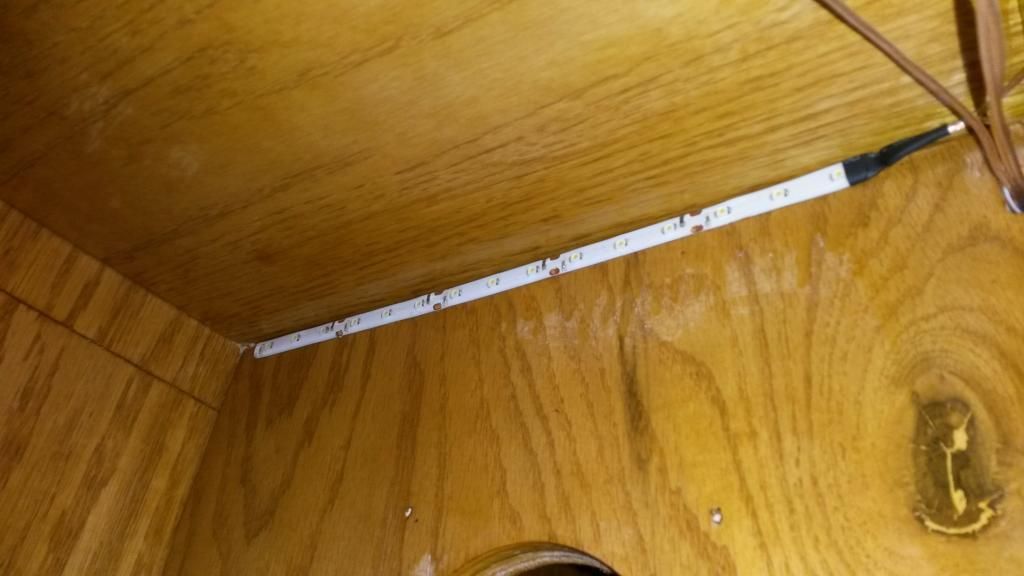
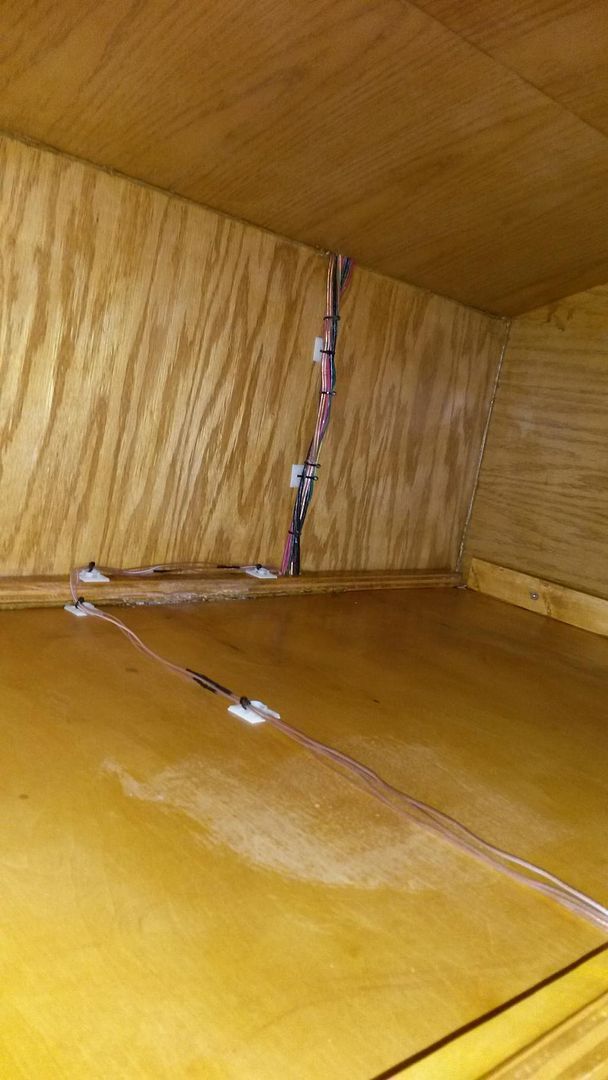
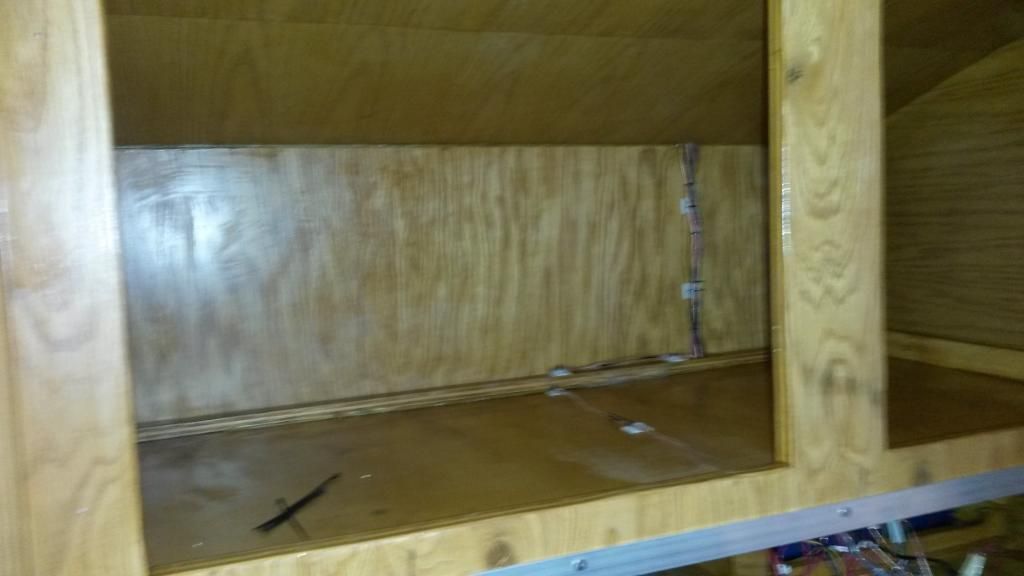
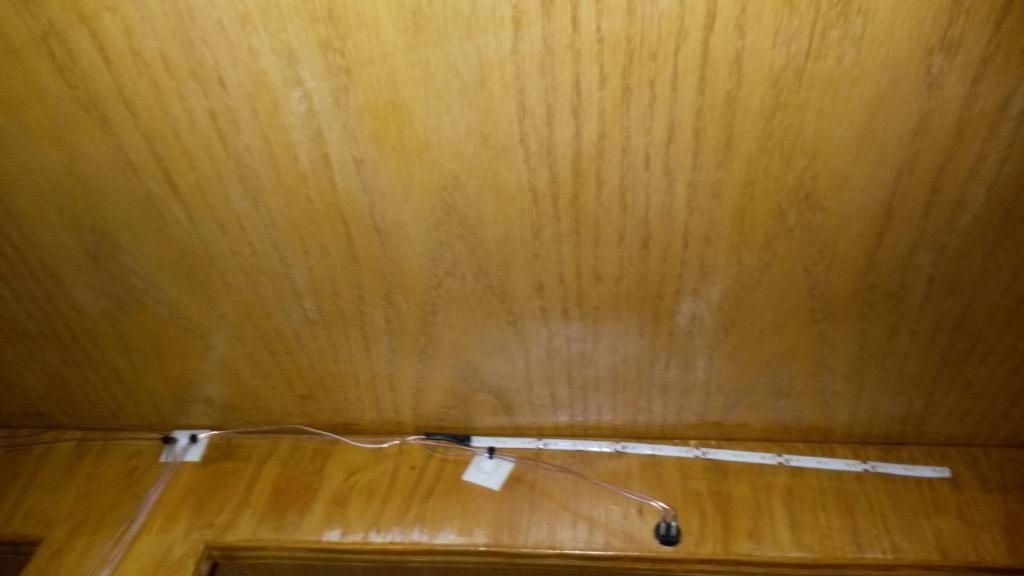
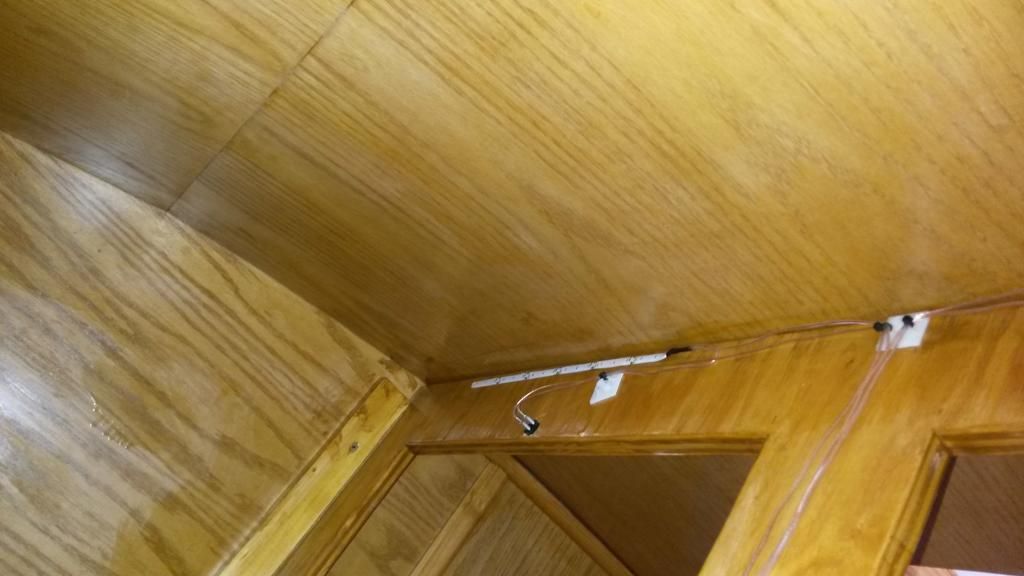
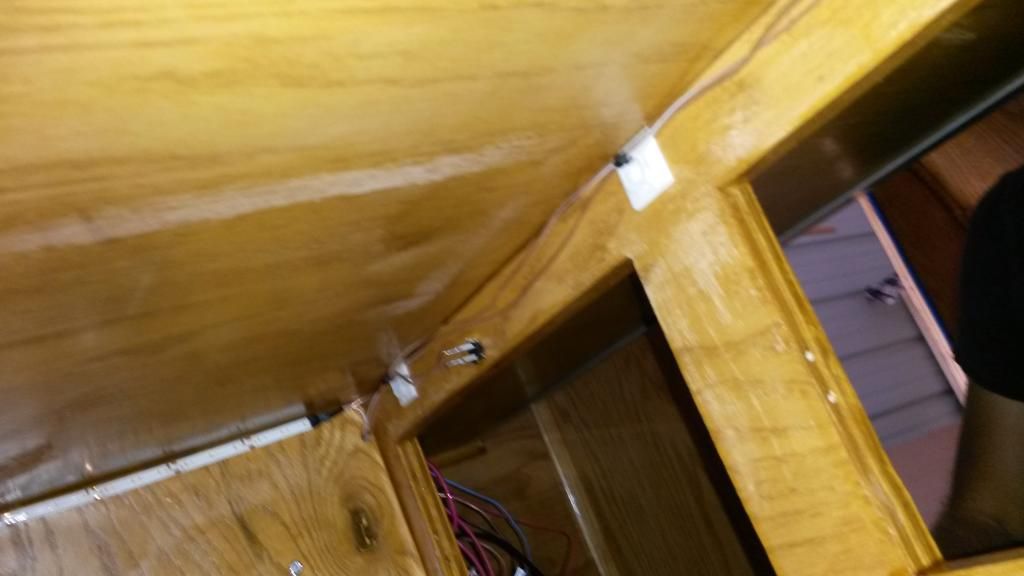
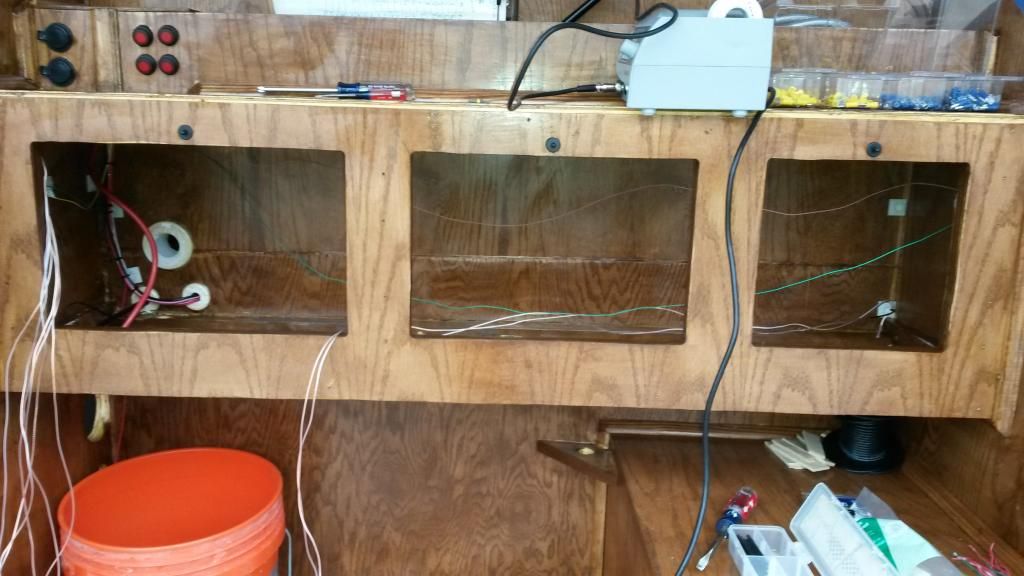
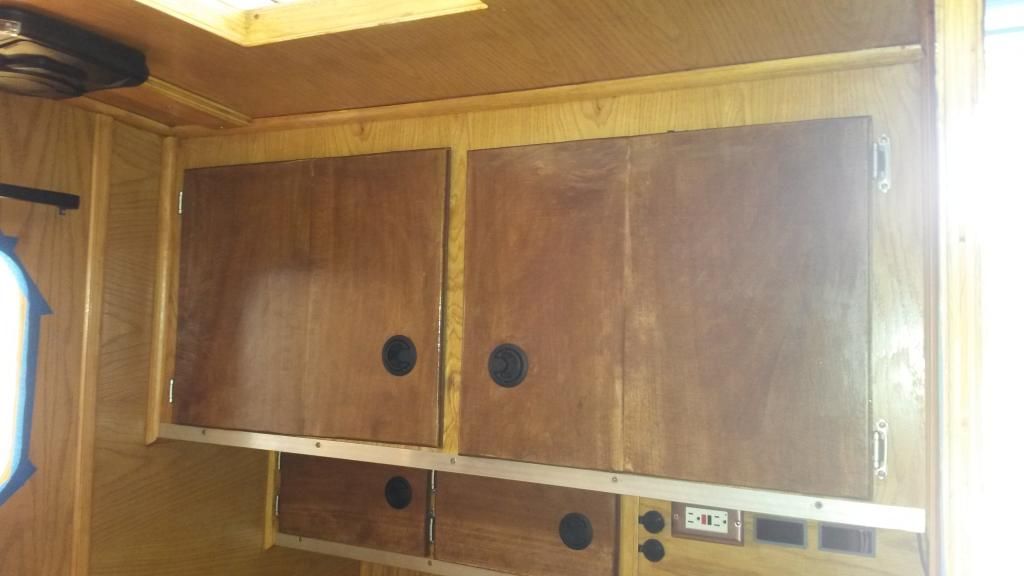
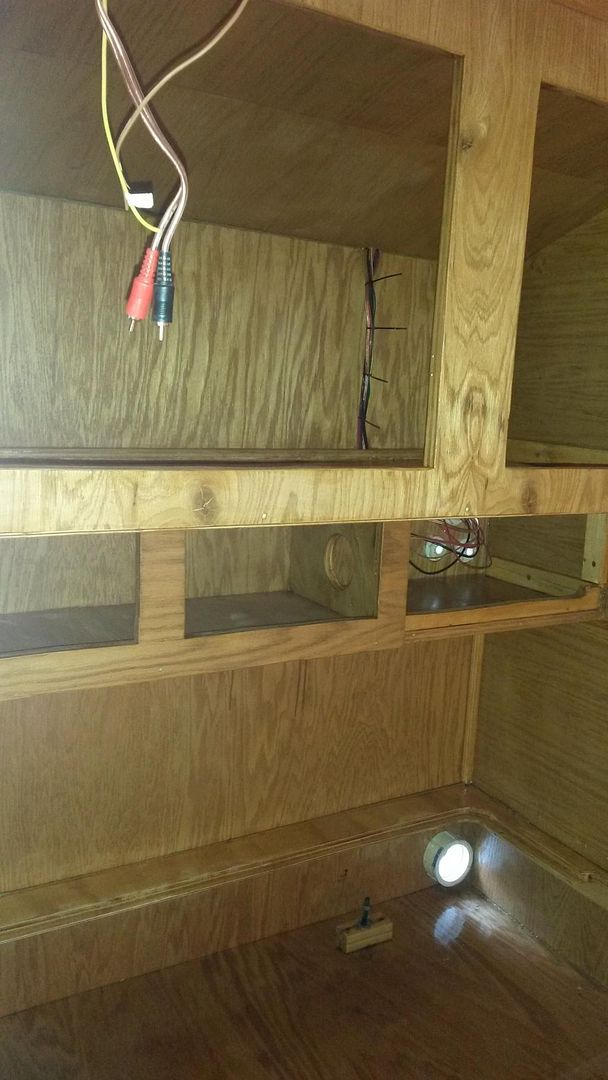
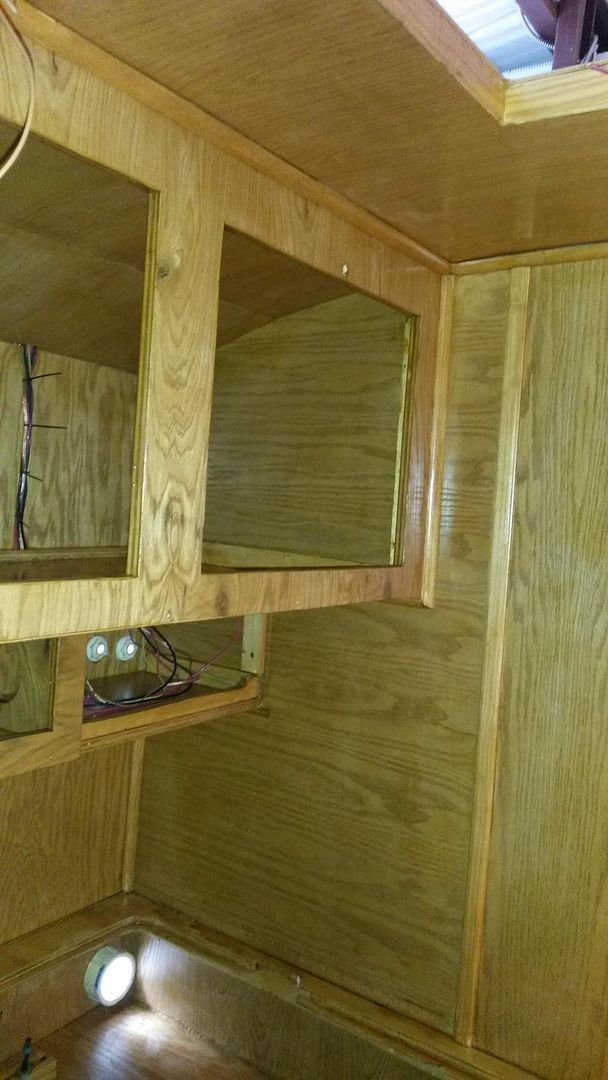
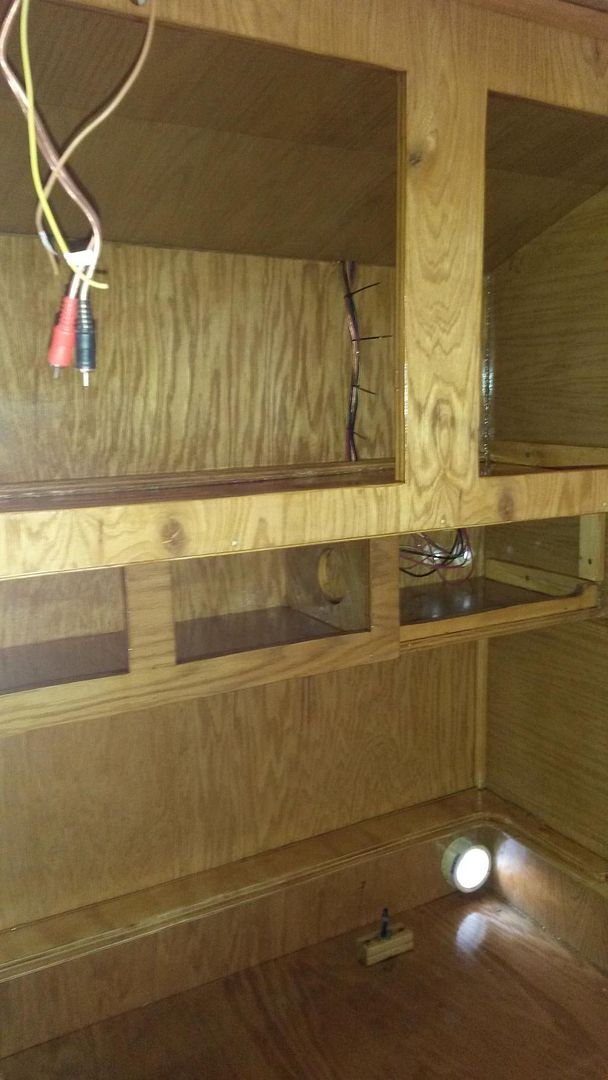
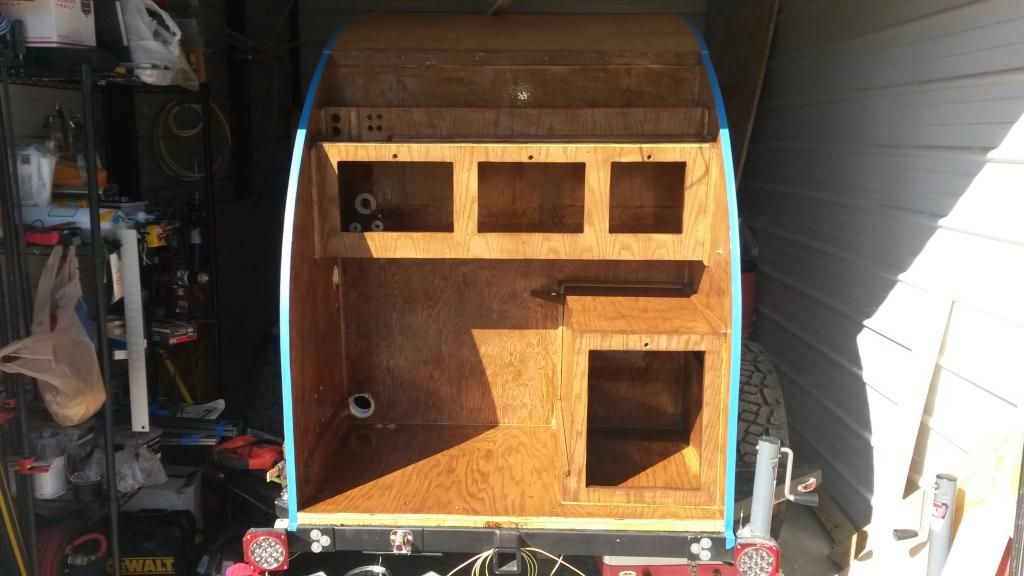
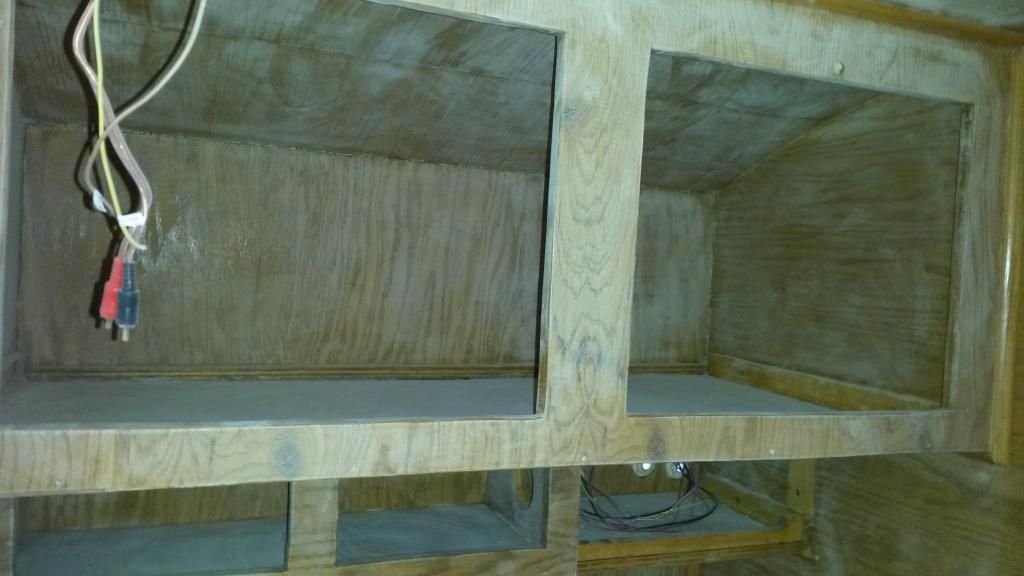
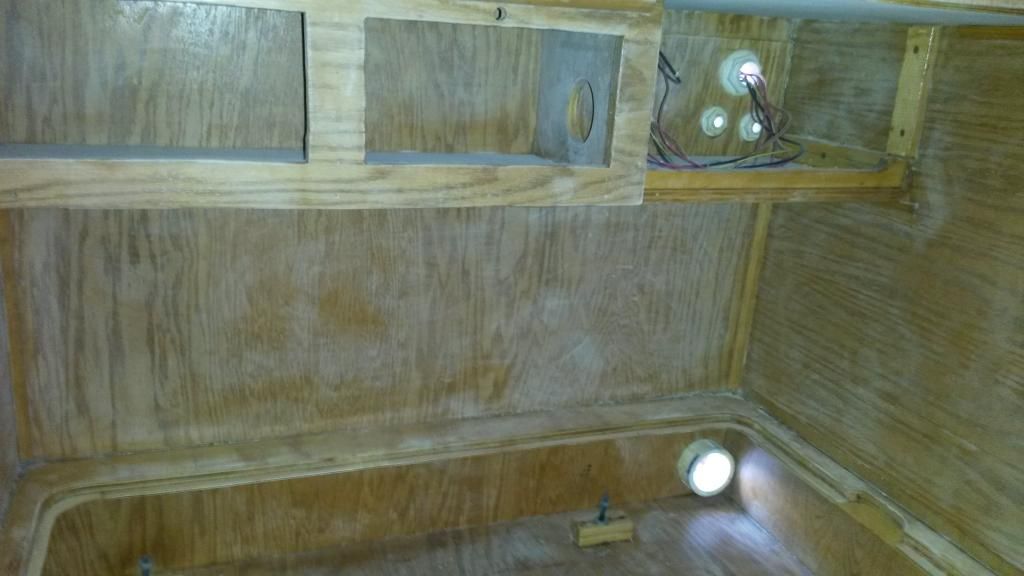
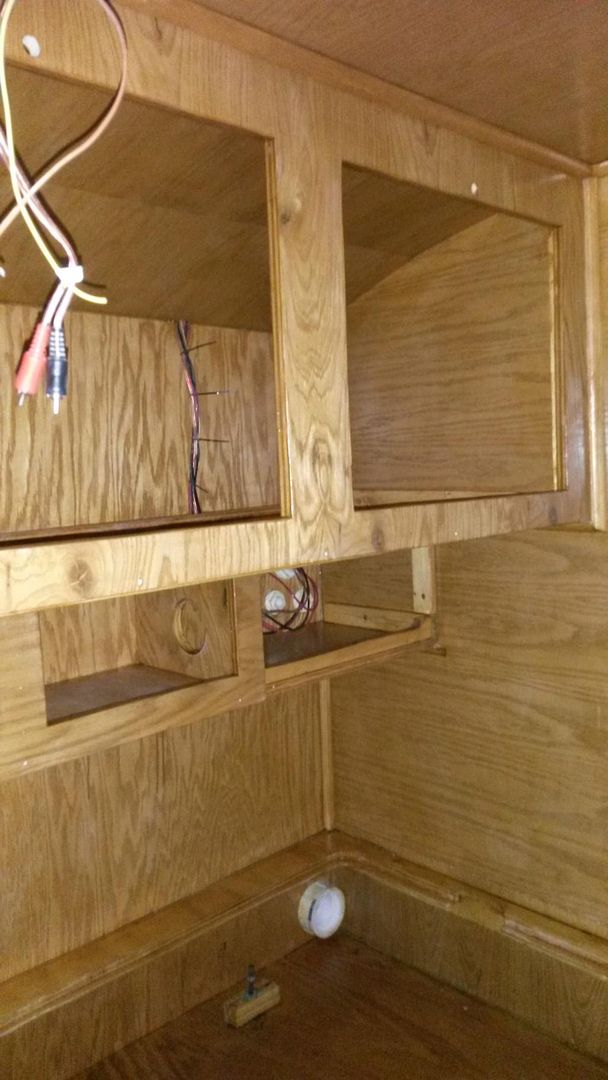
I then went on and started mounting all the interior LED lighting inside the cupboards.
20150214_131853_zpsokyqyw2w.jpg

20150214_131900_zps0folxube.jpg


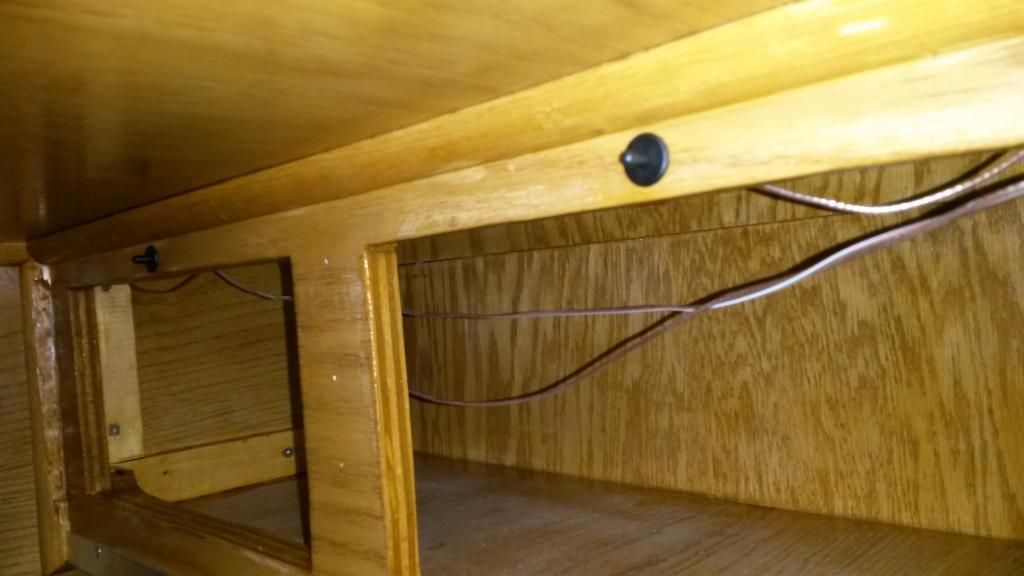
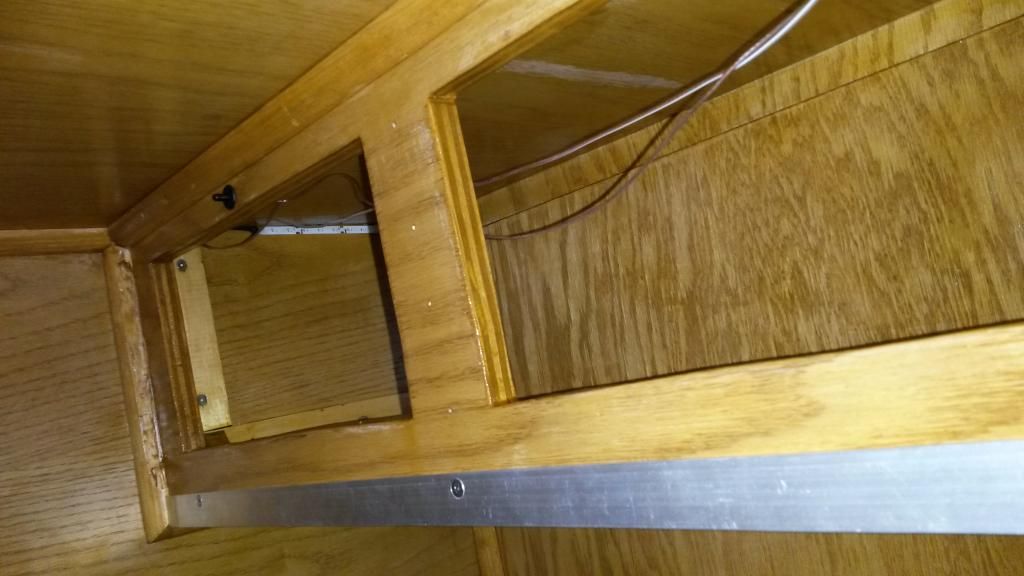
Still have to tuck up the wiring nicely. But this shows the door activated switches. When the cupboard door opens that specific LED will open.
20150214_131908_zpsps4w7hy0.jpg


You can see the switch and LED light together here. I mounted all 4 LED light strips on the inside.
20150214_131912_zpsqjfeiyb6.jpg


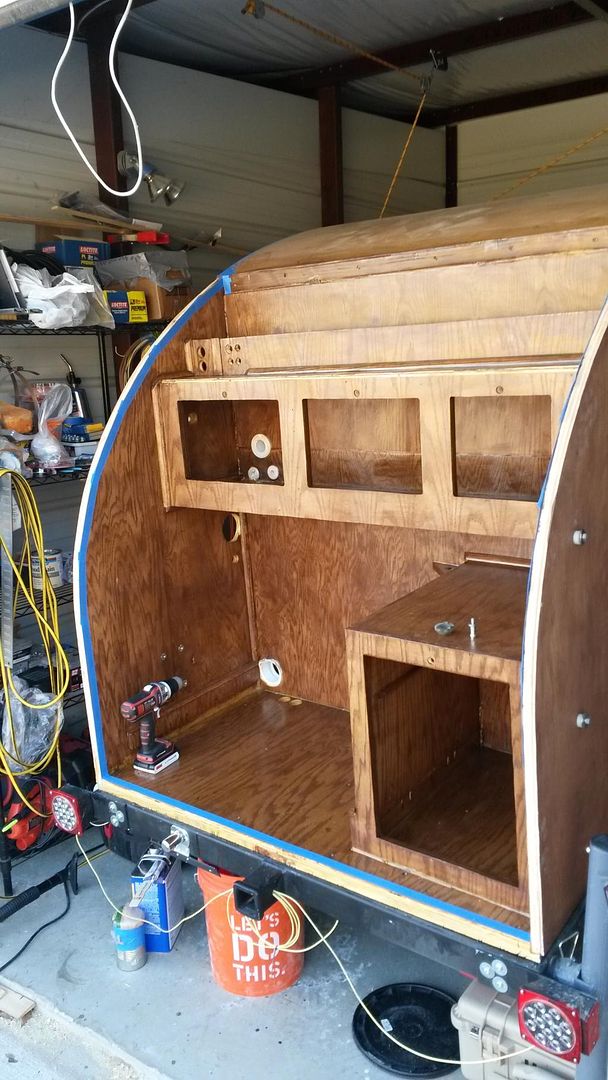
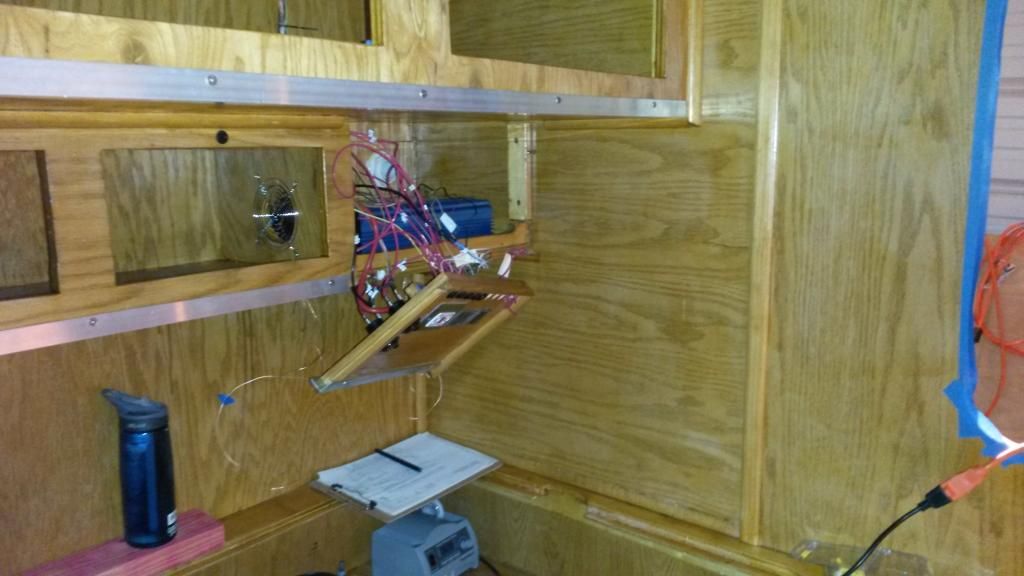
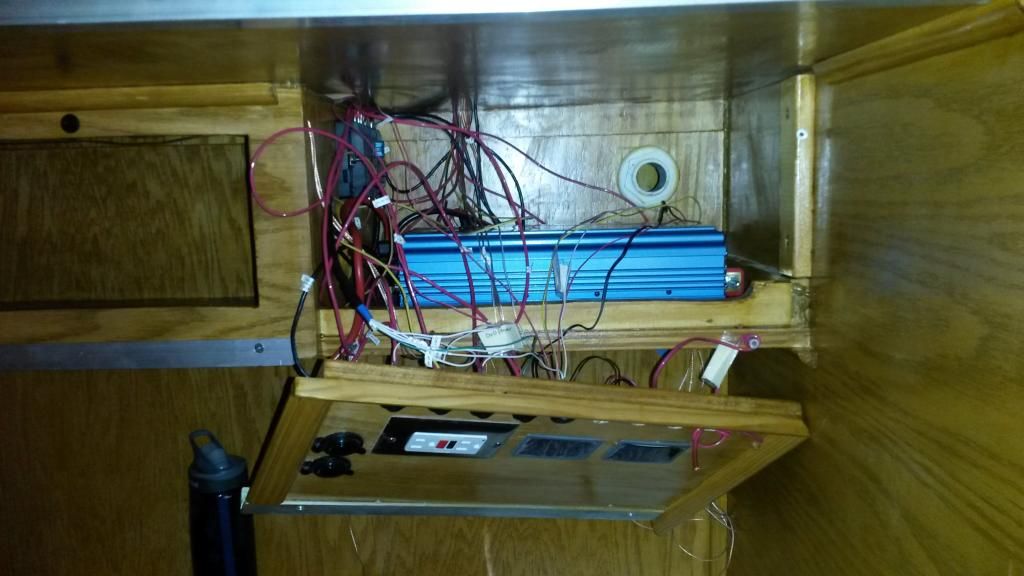
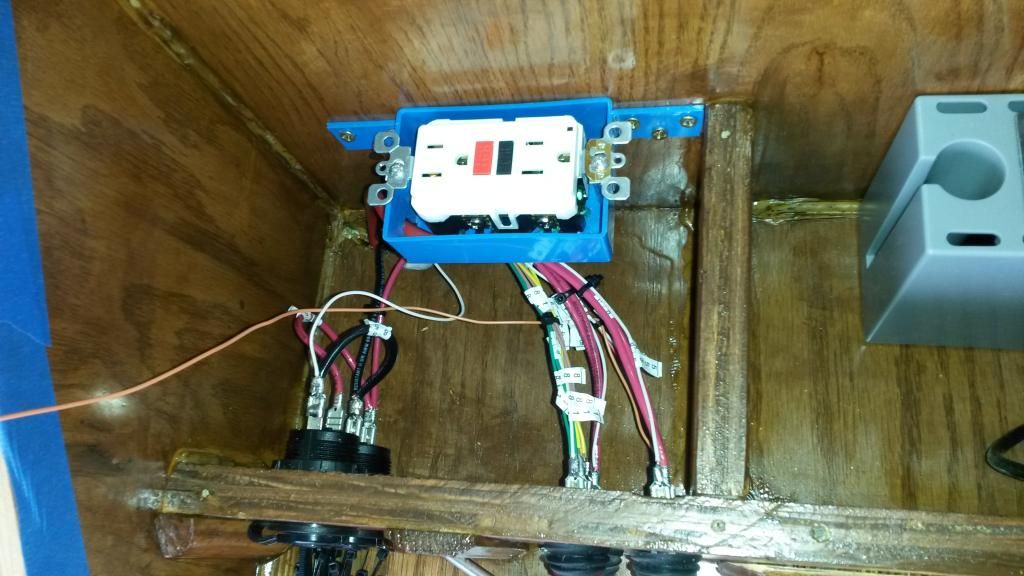
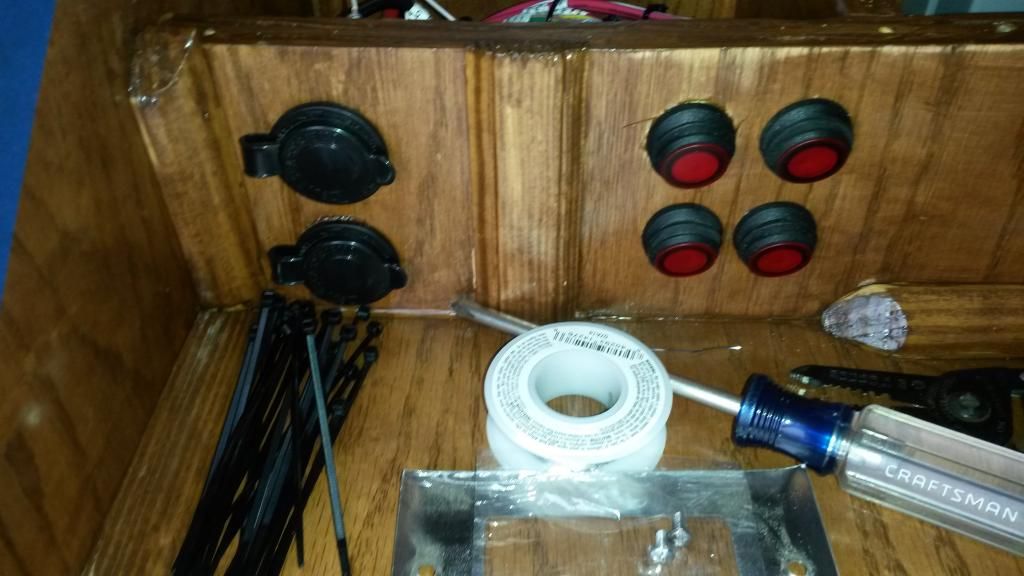
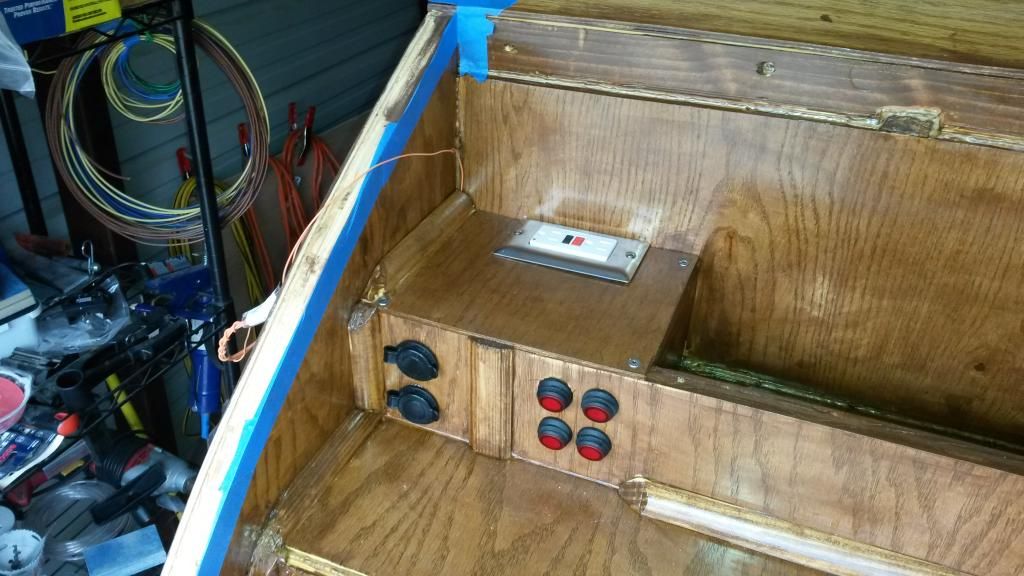
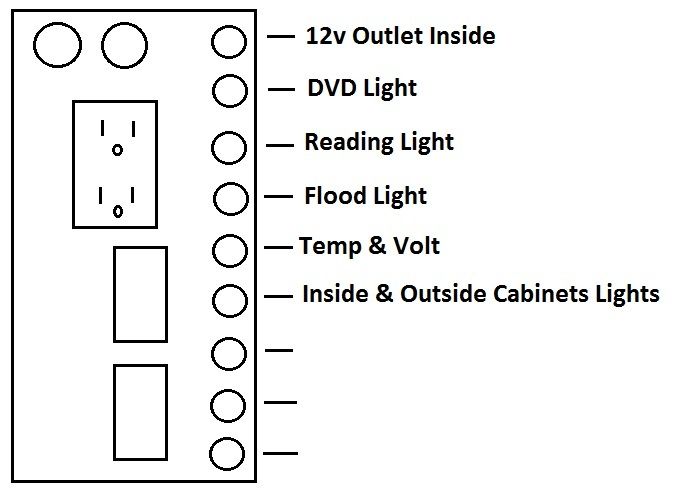
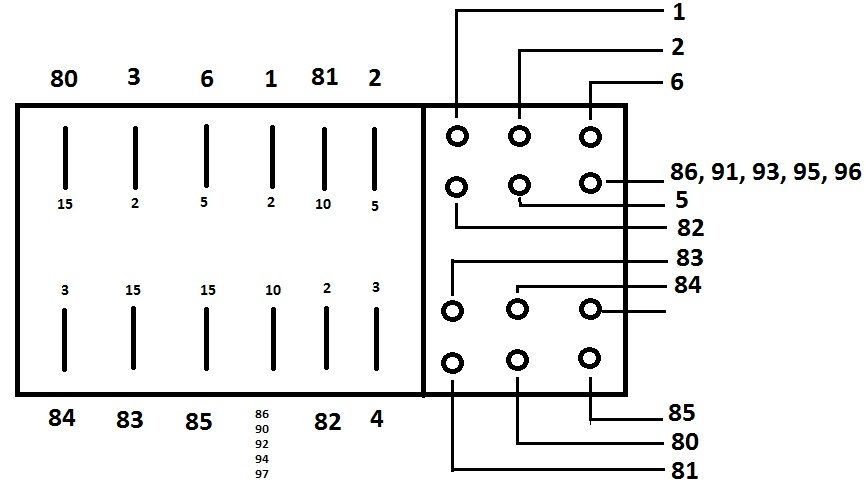
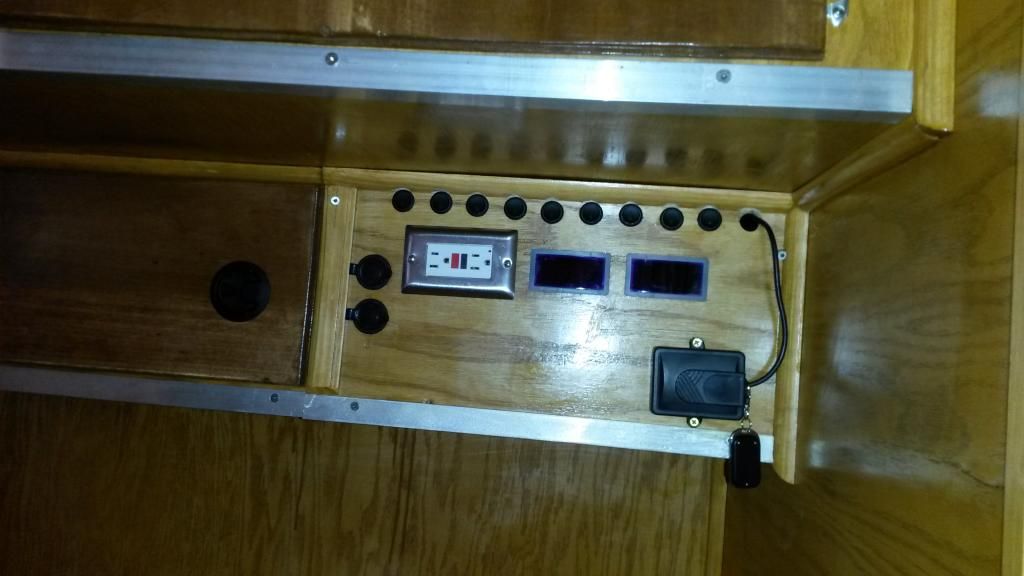
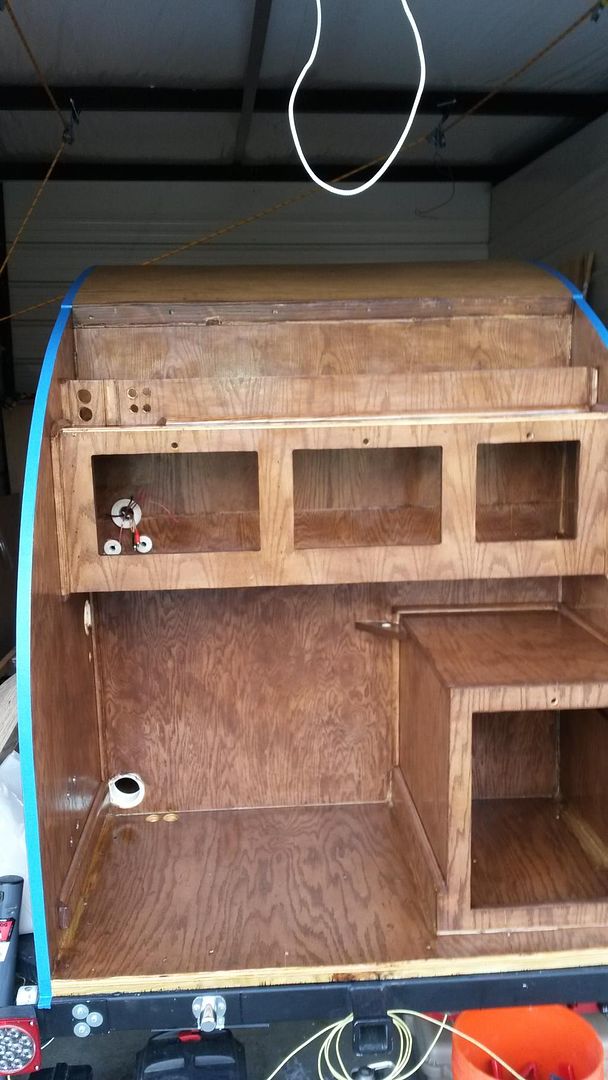
Then I started wiring up the main hub of an electrical panel. With all the switches. I got about half way through it. Along with this mounted the fuse box and the inverter. I know it looks like a cluster **** but it will be cleaned up when all the wires are in.
20150214_195403_zpsncmvt92y.jpg

20150214_195420_zpsq4i5v7hx.jpg


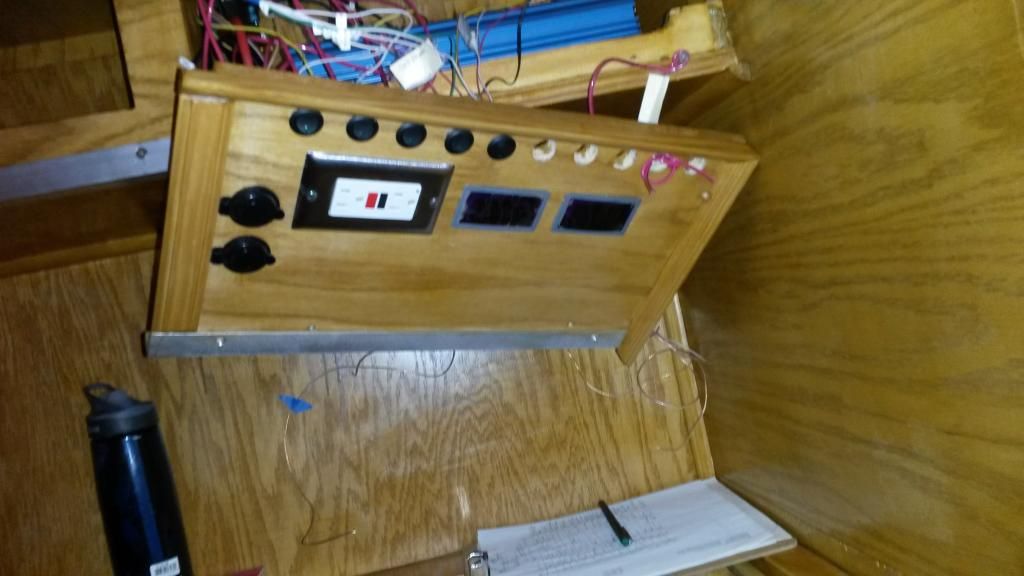
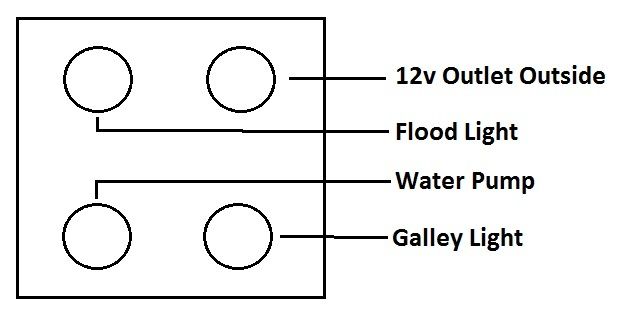
A good view of the front of the panel. The 120volt plug, inside/outside temp gauge, Battery Volts meter, 2x 12volt plug in, and switches with room for expansion.
20150214_195426_zpstacumw5u.jpg


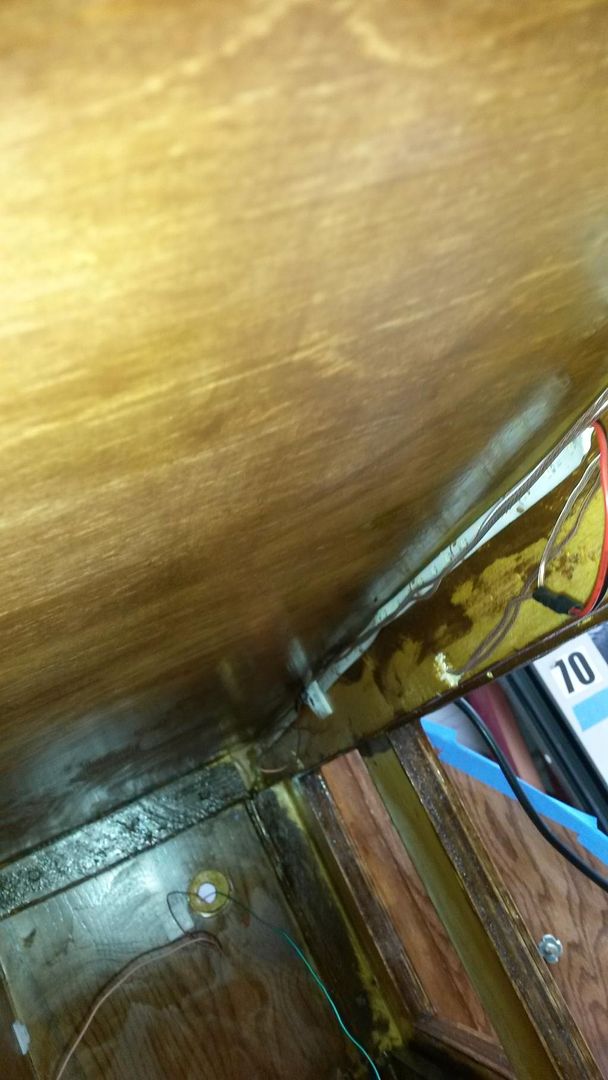
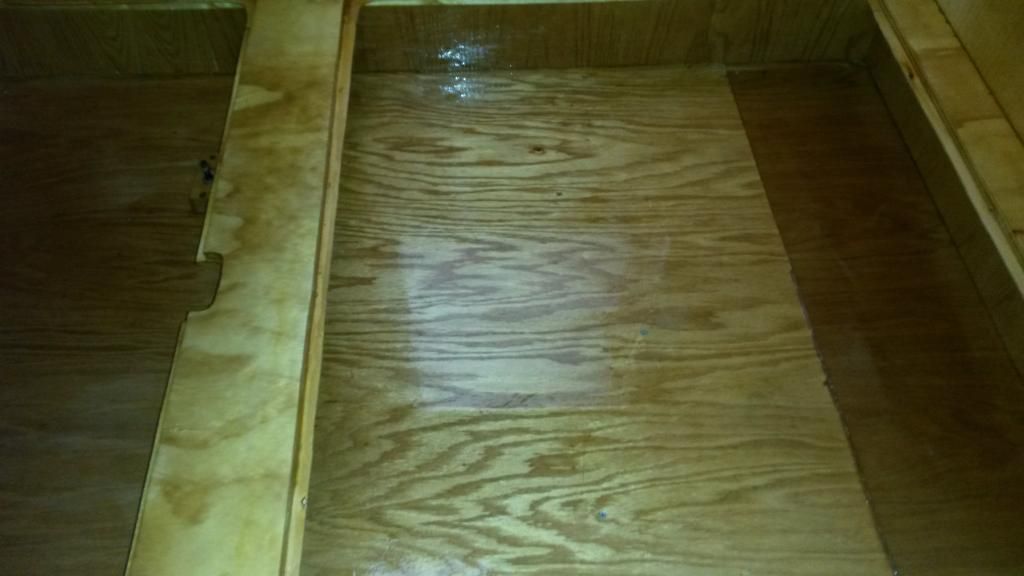
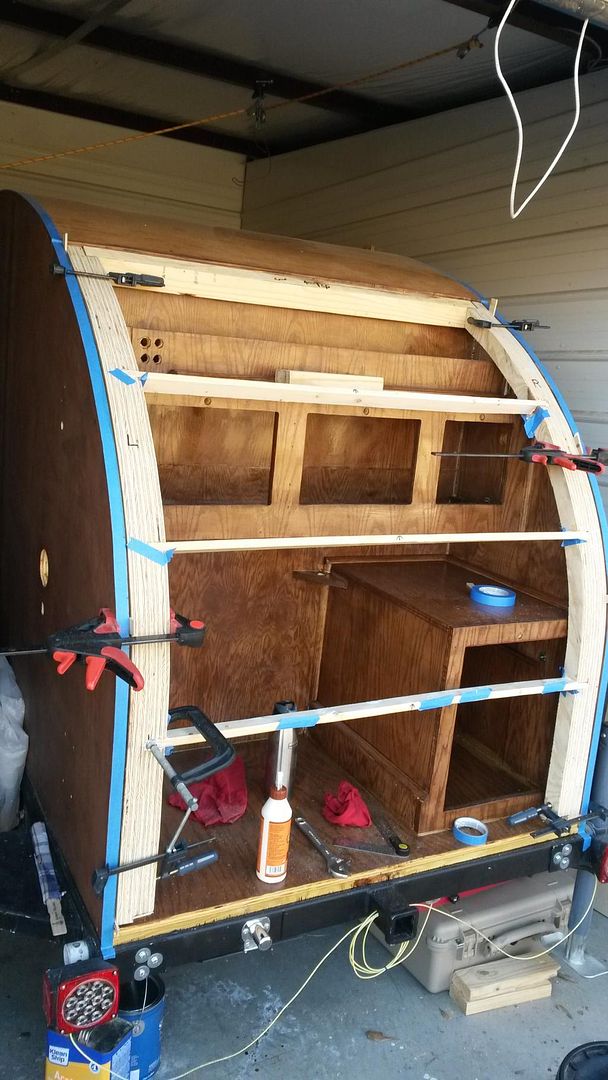
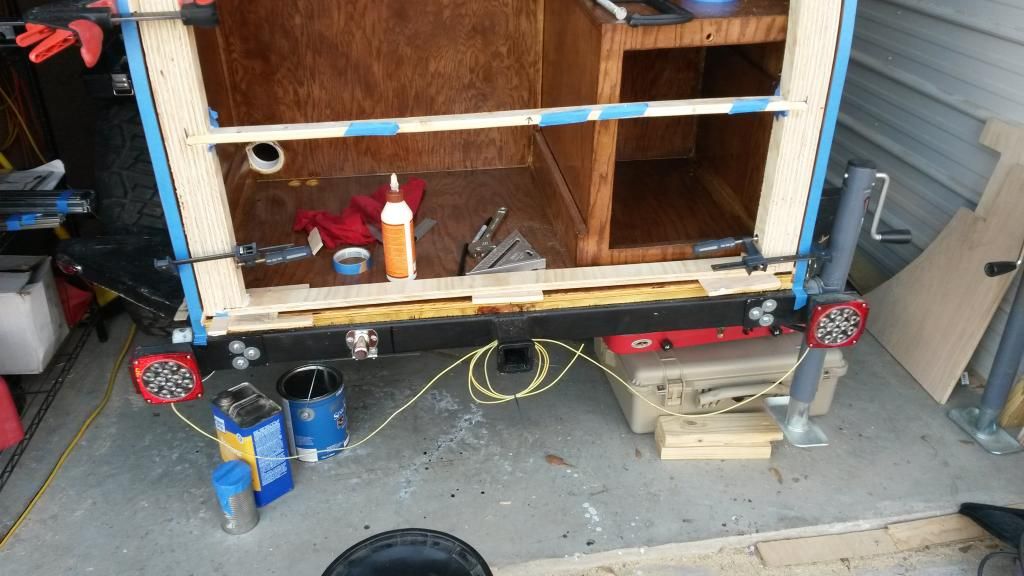
I also mounted then interior corner aluminum panels today as you can see in some of the above photo's.
 

metzican

Suspension Lift
Location
Lafaytte, la
Last day before I head back to work. :(

So I organized the interior wires. Turned out pretty nice. I know there are more professional ways but they are not worth the hassle.
20150215_121641_zpsgxqawla9.jpg

20150215_121647_zpsvuduvffc.jpg

20150215_121656_zpsgfxvknpk.jpg

20150215_121718_zpshbyjerfe.jpg

20150215_121830_zpsr2seuyv9.jpg


I then started working on the wiring in the galley so I can finish the wiring on the inside.
20150215_151307_zpslsw49sog.jpg

20150215_151311_zpscph48m5e.jpg

20150215_152810_zpsgpyjrhlx.jpg

20150215_153304_zpstfkbg9n9.jpg

20150215_161425_zps5sximkxf.jpg

20150215_161436_zps73q2wny1.jpg
 

metzican

Suspension Lift
Location
Lafaytte, la
So I buttoned up my electrical work today. Still have to do the battery box. But that is after I do the side and roof. Waiting on delivery of a Insain fab roof basket to finish the side need to drill all the mounting holes before I epoxy and varnish the outside.

Here are the electrical drawings I drew up today. I have a ledger for this all too.

Inside Switch Panel
Inside%20Electrical%20Panel_zpsqzpuga1j.jpg


Galley Switch Panel
Galley%20Electrical%20Panel_zpsmvjocmwr.jpg


Fuse panel
Fuse%20Panel_zpspx4mmofb.jpg
 

metzican

Suspension Lift
Location
Lafaytte, la
So this is what the inside looks like.
20150304_094733_zps41sxwfmh.jpg


Switch panel all done and mounted up. Still have not decided what to do with the one hole that is open with the wire through it.
20150304_094744_zps735djujh.jpg


So I worked on my galley hatch today on skinning it.

First sheet flexed onto it and strapped down.
20150304_114341_zpswcz5qxqy.jpg

20150304_114347_zpsh8s8ylej.jpg


Making sure it is all still square and will still open and close.
20150304_153956_zpsuud86lsz.jpg

20150304_154002_zps7g49wakb.jpg


Finishing up the skinning. This will get aluminum skin put on it.
20150304_182420_zpsks8tbyo5.jpg

20150304_182437_zpsvjqzppy7.jpg
 

metzican

Suspension Lift
Location
Lafaytte, la
Assembled my hot what heater today. Made a nice little aluminum frame to hold everything. It's far away from the lid not to melt anything and still closes. Also with all the quick disconnects on the bottom it will be easy to setup.
20150306_112430_zpsyjnpkiap.jpg


Put the first coat of epoxy on the sides. It was hard to get a picture to show it.
20150306_112923_zpsgjy1nmrk.jpg


Tomorrow I will sand and do again...
20150306_112931_zpsd4noirrf.jpg


20150306_112942_zpsjjzckkzx.jpg


Also I figured out how I am going to skin the inside of the galley hatch today. I decided to inlay the skin so the ribs will show, I thought this would give a great look.
20150306_134543_zpsjz9msxgn.jpg
 

metzican

Suspension Lift
Location
Lafaytte, la
I received my steps from P&P. I have to say this thing turned out wonderful. I gave them full drawings for the top and middle step then told them to be creative with the bottom one. This thing is amazing. Even with the angle these things fit perfectly. What can I say they do amazing work. The way the bottom step folds down and back up is perfect to tuck out of the way not to get ripped off yet is easy to lower and lift and can support your weight.

Anyways I clamped these up. Drilled all the holds for mounting and made sure everything lined up perfectly. Then had to remove them so I could finish the sides.
20150307_112900_zpsx8pj2nzp.jpg


20150307_112907_zpsvgixglrc.jpg


20150307_112915_zpsldafygxp.jpg


20150307_113016_zpshwx06fq9.jpg


20150307_113023_zpskon37k3y.jpg


Then I put in the next skin on the inside of the hatch.


20150307_123205_zpsxuj0jvaa.jpg


20150307_123213_zpsodw6zfcu.jpg


I also ran the wire from the electrical cabinet in the tear drop to the front of the frame where it will attach to the battery. I also grounded everything to the frame. I did not take any photo's will try to tomorrow.

This morning I also put on the second coat of epoxy and just finished putting on the 3rd coat this evening.

Tomorrow is sand it down and try to put on the last coat hopefully it will end smooth.
 

metzican

Suspension Lift
Location
Lafaytte, la
So today is the last day of work for the next 3 weeks!!!!

I sanded down the previous 3 layers of epoxy to smooth it out. I had a lot of runs.
20150308_105219_zpsa4dkzg9a.jpg

20150308_105230_zpszm888etm.jpg


Then I applied another thin layer of epoxy to the walls.
20150308_141108_zpscfsknovb.jpg

20150308_141116_zpsjsgrzdbe.jpg


I applied the first coat of epoxy to the rear hatch interior. Just one more on the inside before varnish.
20150308_141054_zpsl3abtene.jpg

20150308_141054_zpsl3abtene.jpg


I took some photo's of the power cable run to the front I did yesterday.
20150308_141147_zpsuywoef2a.jpg

20150308_141200_zpsjc7pfnk4.jpg

20150308_141224_zpswesy55ja.jpg
 
Top