To begin with, if you mount on the wind deflector in front, I suspect you're going to get a fair bit of glare on your windshield. But that doesn't stop a lot of people. You have a couple of options for routing your wires - either drilling your roof under the roof rack attachment up front, or running wires through the rack to the back, where you can enter through the grommet under the hatch on the driver's side. I did the former on my gen1, the latter on my gen2. I suspect there are other options, but those are the two I know of. Some people are leery of drilling a hole in their roof, but the wiring part is a lot easier from there down the a-pillar and behind the dash. coming in from the rear means you have to run wire all the way back to the rear, then back to the front. either way, on the gen2 you run your wires through the firewall on the driver's side to get to the battery.
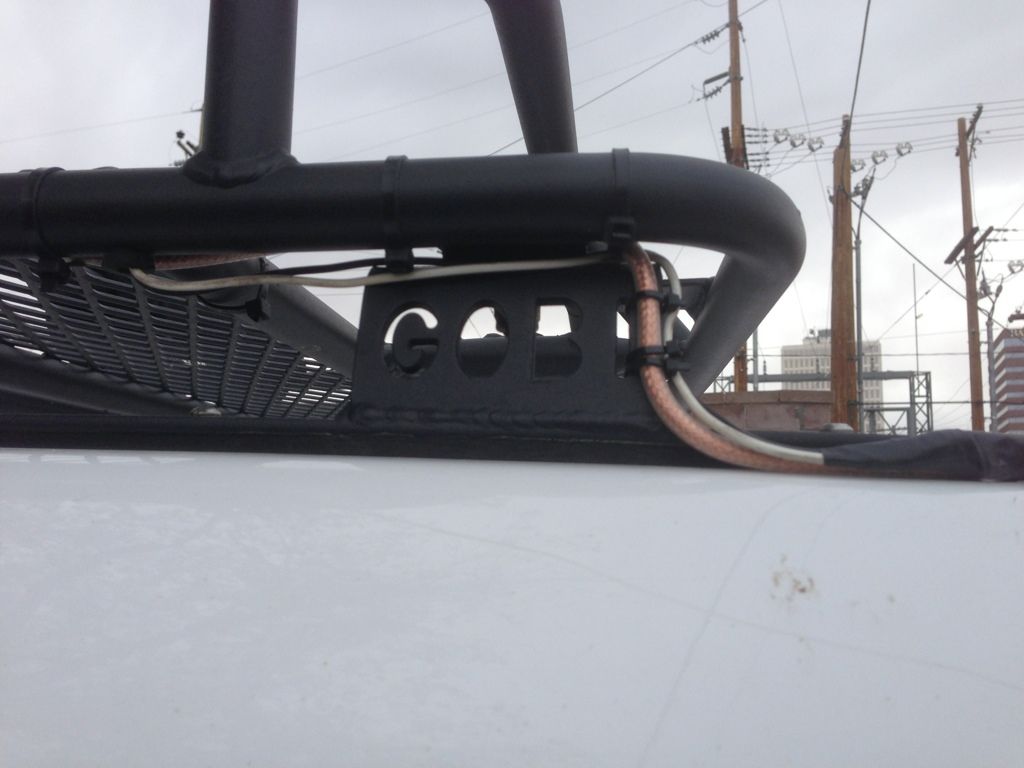
Here is the roof in back, driver's side. you can see that 1) I don't have a stock roof rack and 2) I ran both my CB cable and light wires back through the grommet under the hatch in back.
Sorry I don't have a pic of the grommet and entry point in the back. It's pretty obvious when you open the hatch.
Here is the firewall on the driver's side. Pretty easy to get to, actually. A lot easier than the gen1.
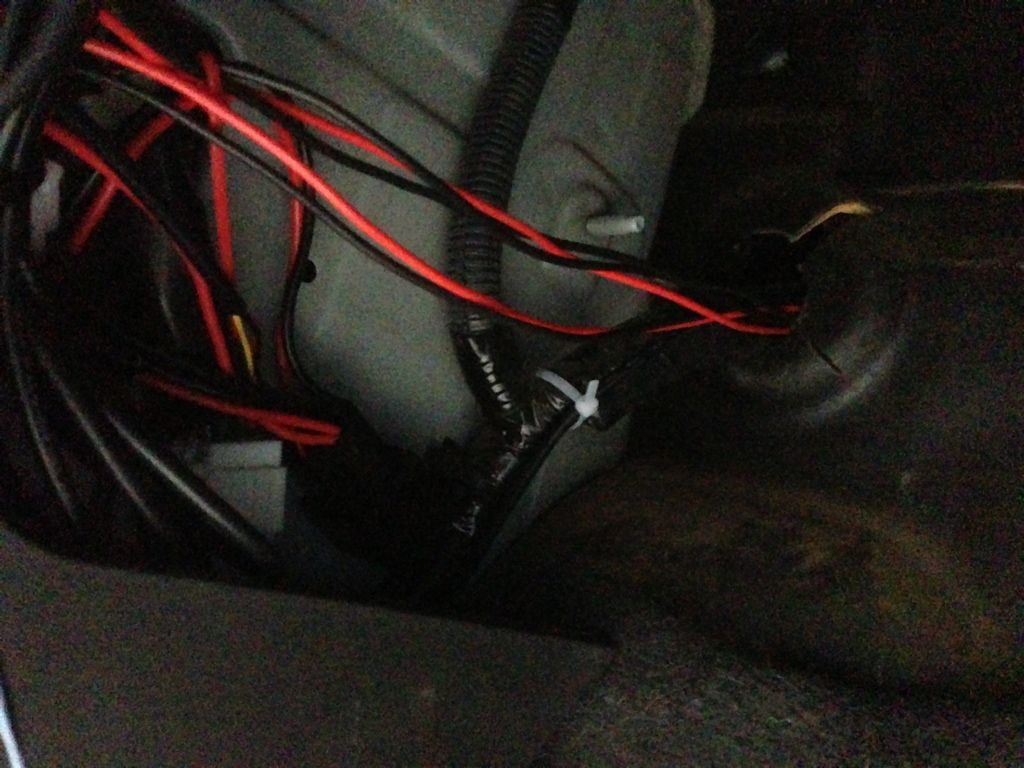
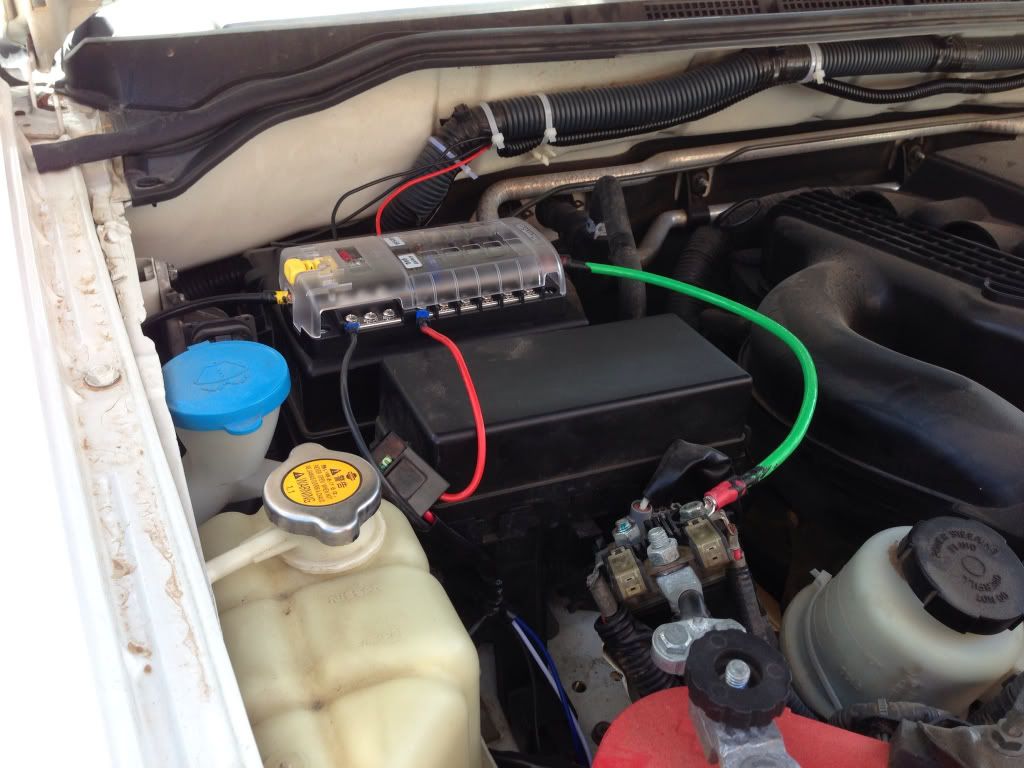
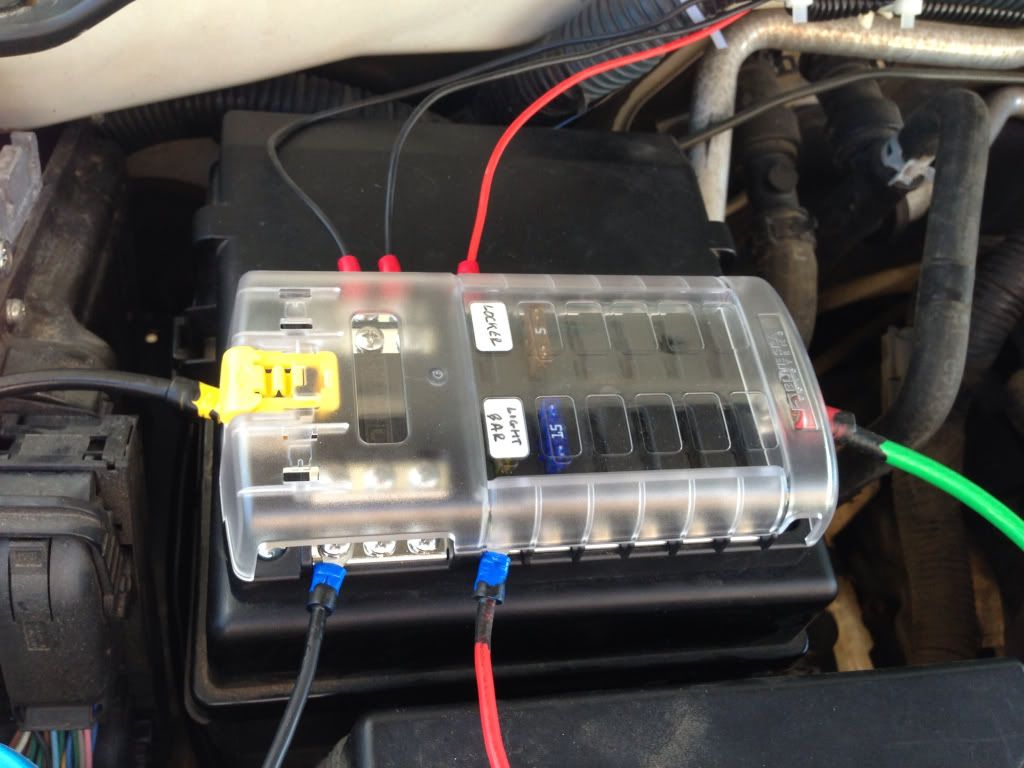
Here is how I set up the power to the lights. Went with a Blue Sea distro block, from which I also run my locker. Firewall entry is out of frame to the right (driver's side). I zip tied wires behind the bundle running across the firewall
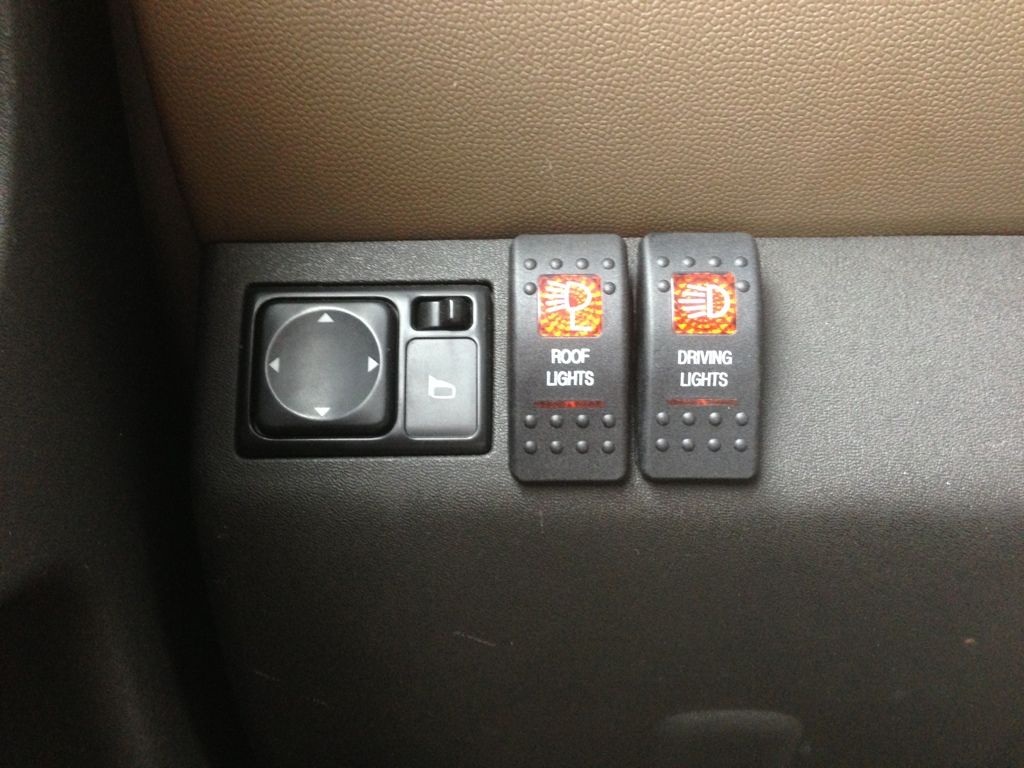
Switches inside
Lights
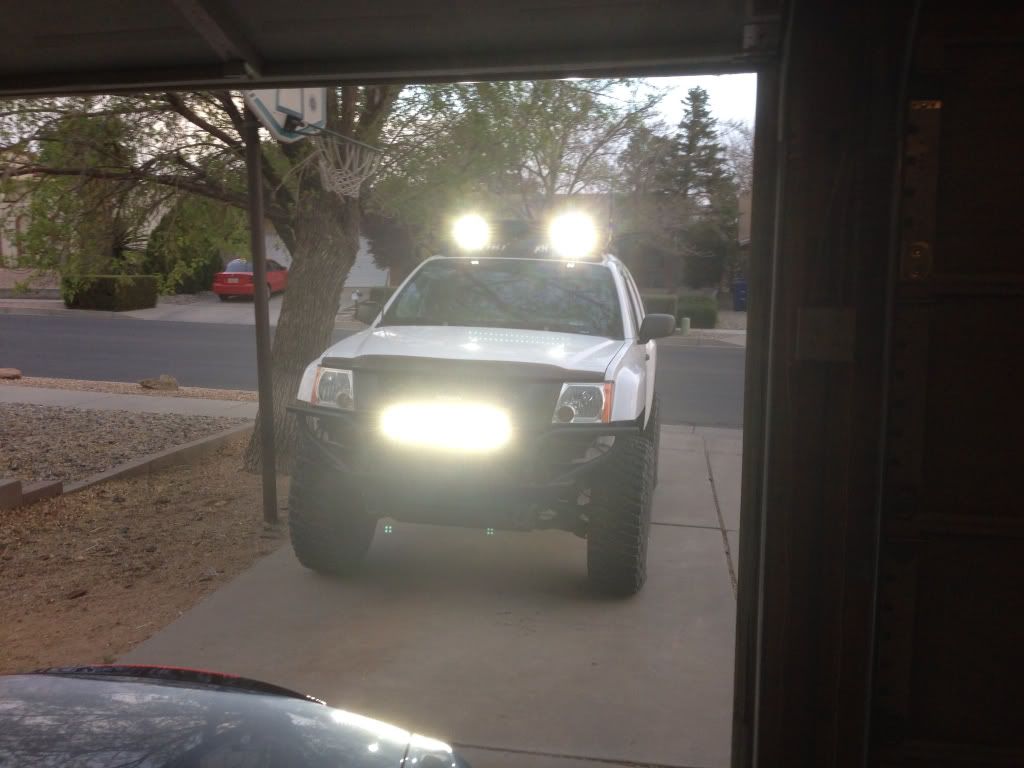
I have a bar on top now in addition to the two spots. All are run back through the rack to the rear, in through the grommet driver's side under the hatch, behind the molding on driver's side, through the firewall as shown. That's the least invasive way, although you end up running a lot of wire (all the way back, all the way forward).
If you don't wire through a distro block, make sure you put an inline fuse in there!
Do you have a wiring harness, or are you wiring from scratch?
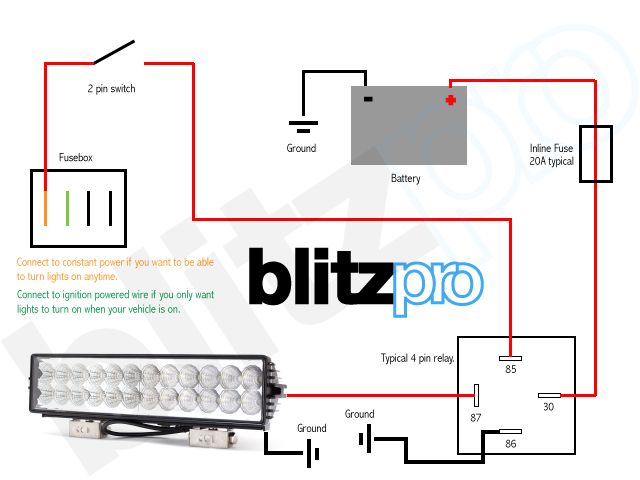
Here's a decent wiring diagram for guidance: