Anyway you can copy the link off of club x? I am a member over there too but I am an active member on this forum.
http://www.clubxterra.org/forums/showthread.php?t=20109
1. Remove the nut at the base of the POS stud. Remove the 5 stator nuts (8mm). Then, remove the 4 bolts (8mm) holding the front and rear cases together.
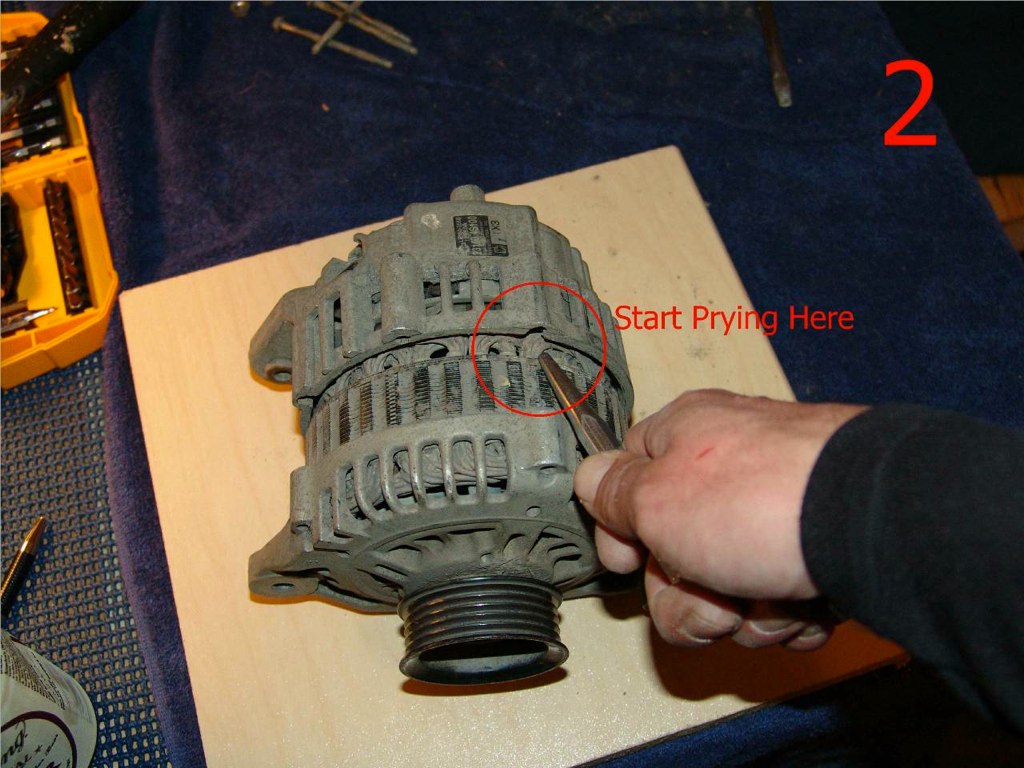
2. Use a large punch or other suitable tool to start prying the rear case from the stator. Use the four recesses in the case bolt guides to gradually separate them. As the gap increases, use a large flat head screwdriver in a twisting fashion, gradually working around until all is separated. The rear bearing is wedged into the rear case, but it will pop out.
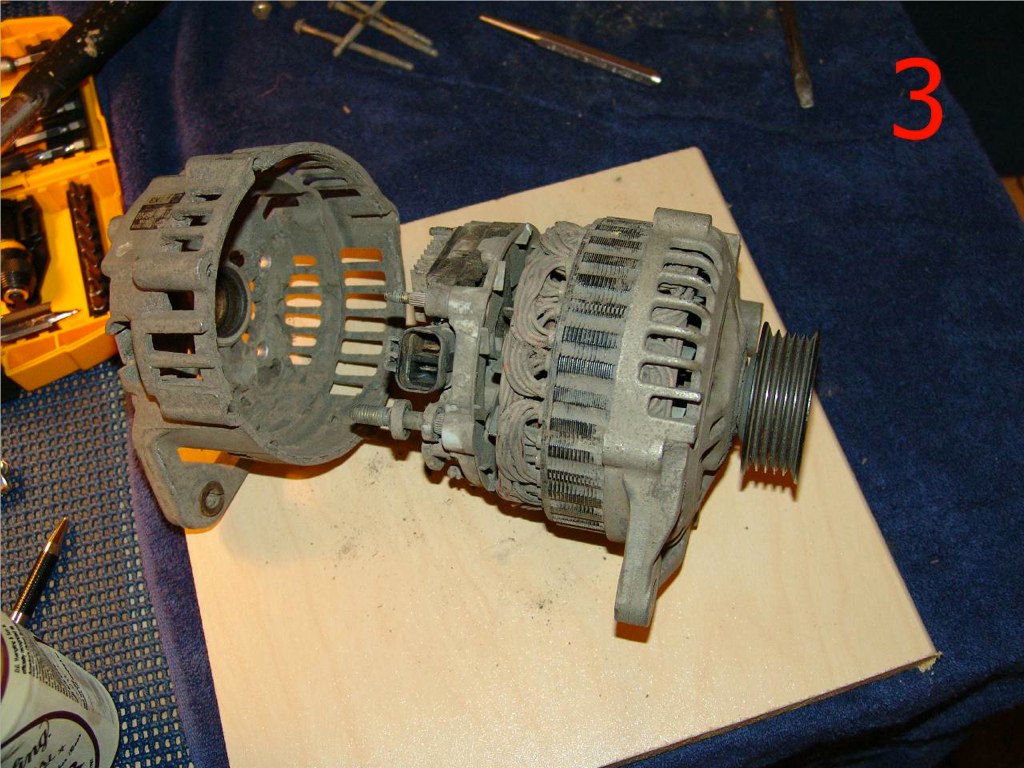
3. You’ll have 2 pieces that look like this.
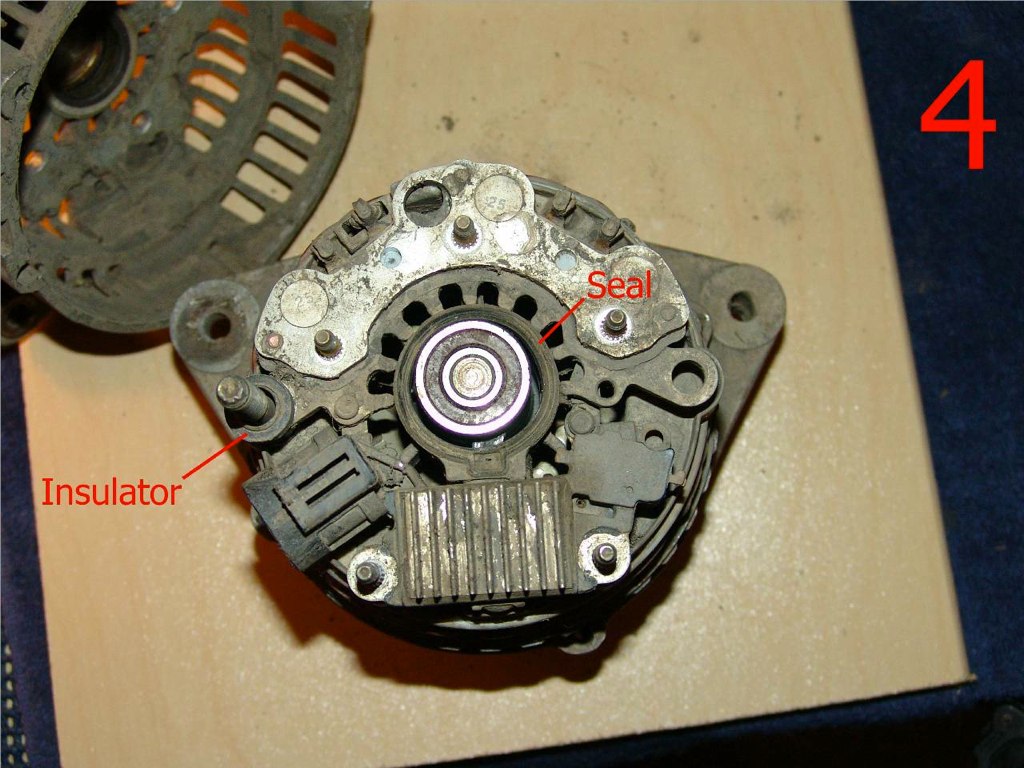
4. Notice the seal and insulator. Don’t loose these!!
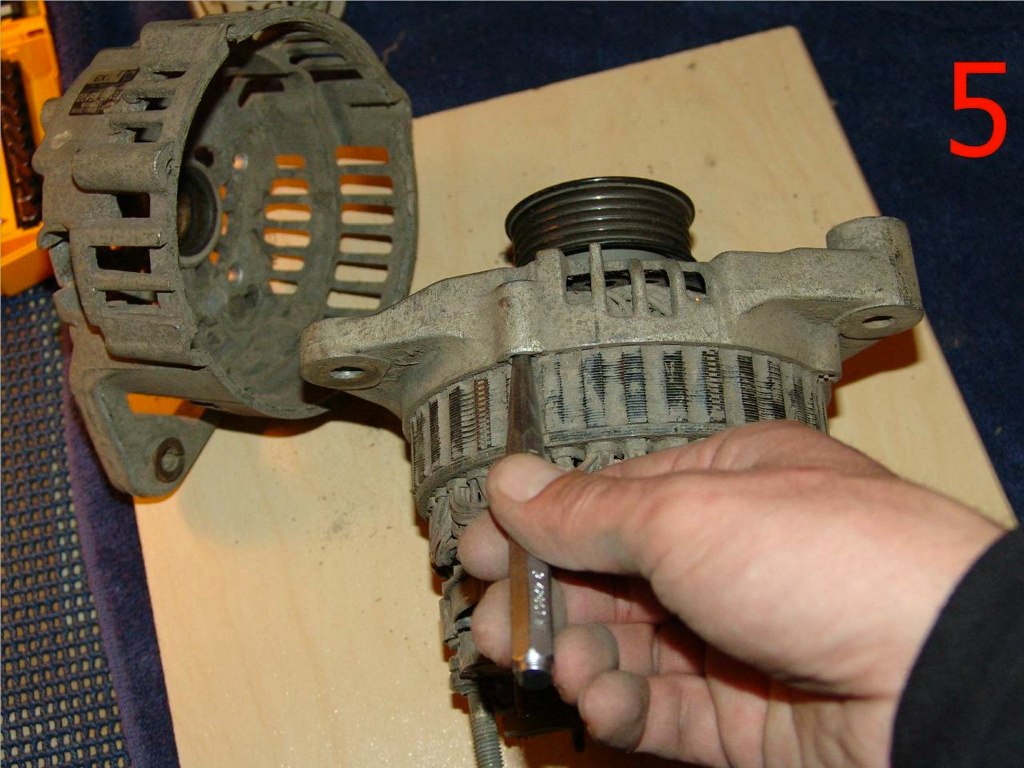
5. Start prying off the front cover in the same fashion as the rear.
6. Three nice pieces.
7. This is the rear shaft. Use a small gear puller to remove the rear bearing. The slip rings are what the brushes ride on to make the charging circuit.
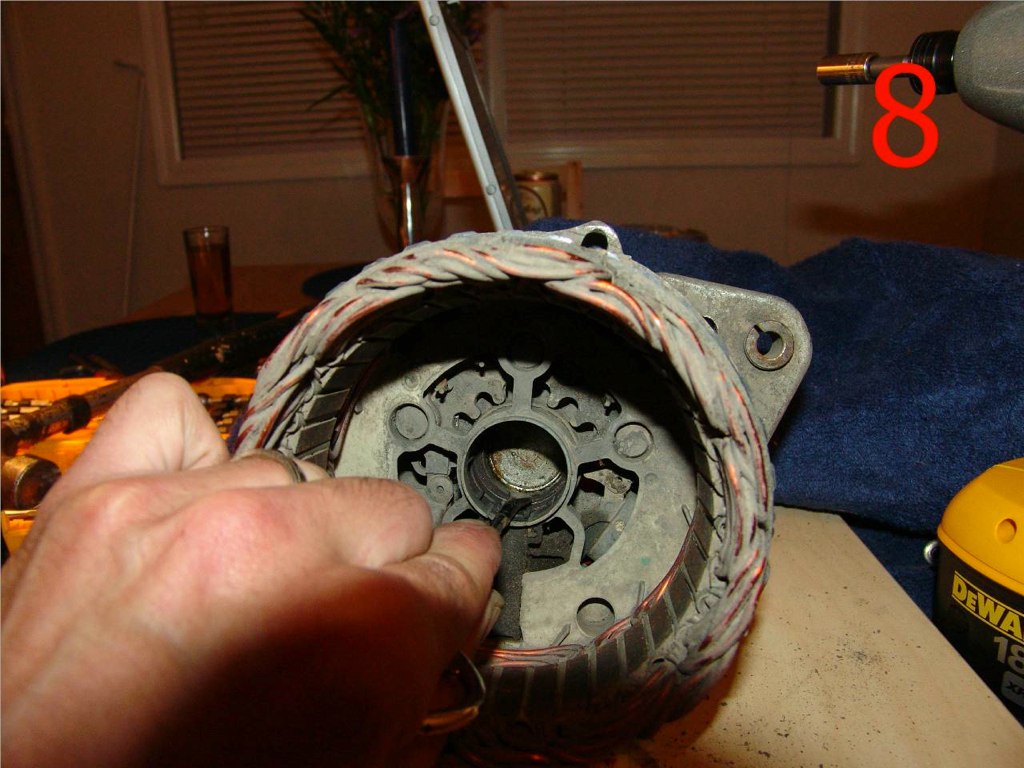
8. If the brushes are frozen in their keys, use a hooked tool or wire and some degreaser, PB Blaster, etc… to free them. They ride on springs so keep pushing and tapping on them until they pop up and move freely within their keys. This may take some time and don’t worry, they are tethered to the internal wiring and won’t fly out.
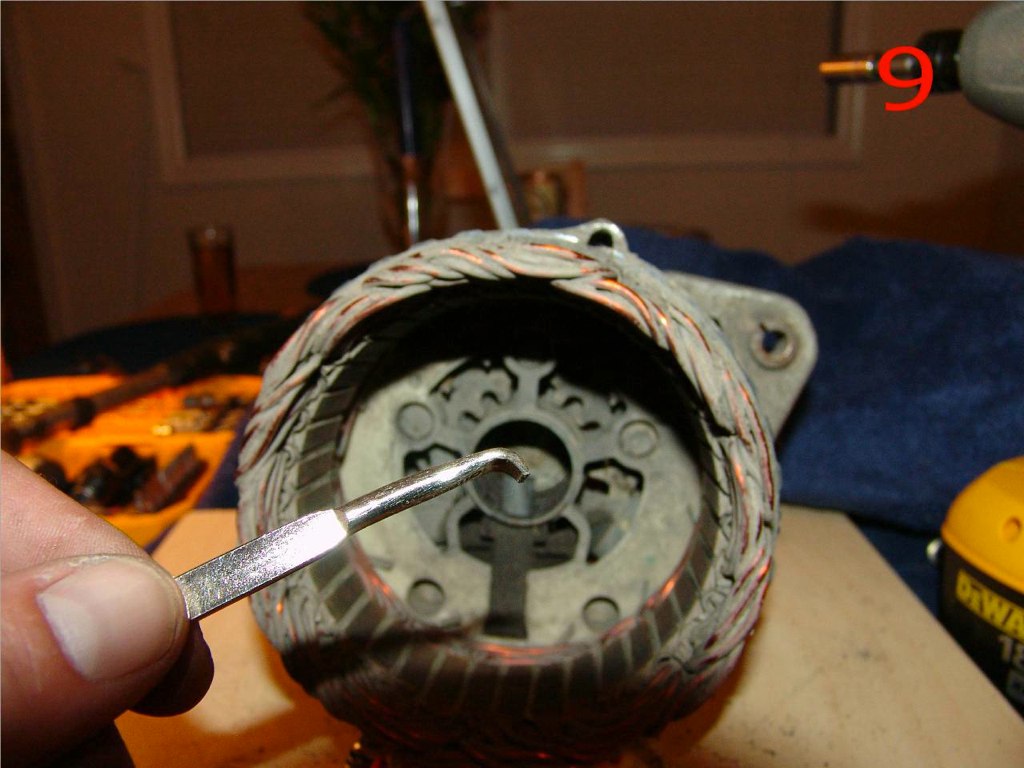
9. You can use a paint can opener, or similar device, on the brushes.
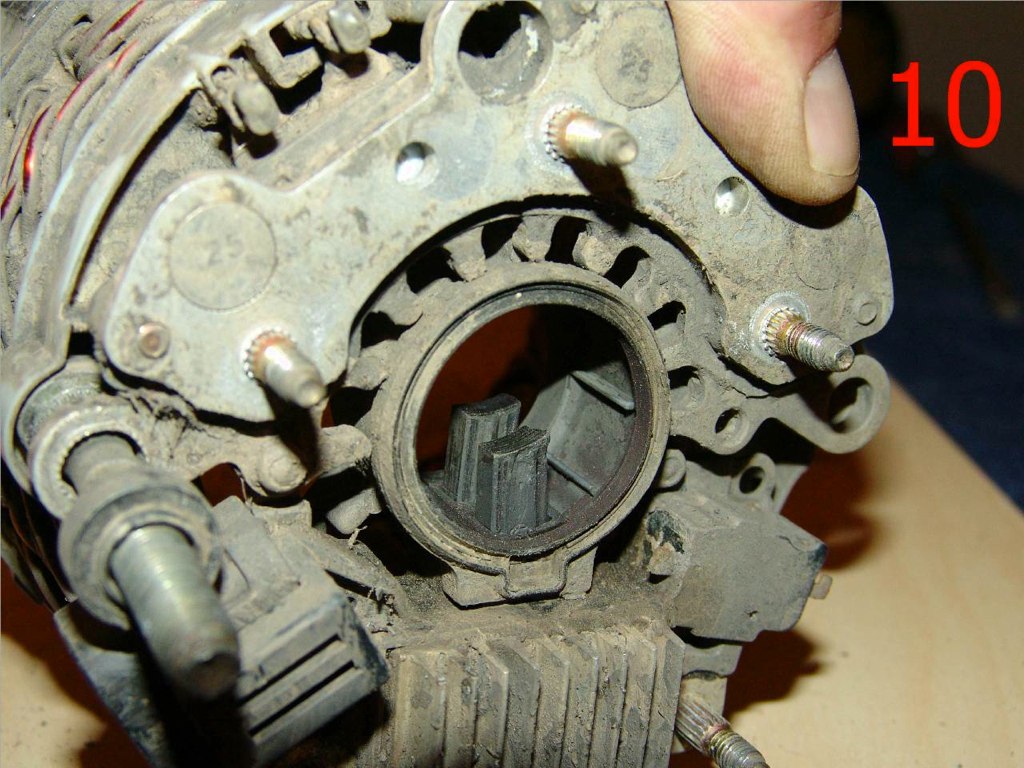
10. This is what the brushes look like when all is said and done.
11. Assemble in reverse order. Here are some hints:
12. Tap the new rear bearing on with a drift that fits just around the shaft and contacts the inner race. I use a socket for this. If the drift is any bigger it will put the force on the plastic housing or outer race. The bearing is a slight press-fit but it doesn’t take much force.
13. Don’t forget to put the seal and insulator back on!! It isolates the main positive lead from negative ground. If you forget the insulator, you’ll short the main fuse for the charging system.
14. To get the brushes back over the slip rings take a paper clip or piece of wire and push it into the hole in the rear cover. Take the hook tool and push down on the rear-most brush while pushing on the wire until the wire slides over the brush. Do the same on the second brush. Now the rear bearing will snug down into the rear cover.
15. Snug, the case bolts in a gradual, alternate manner.
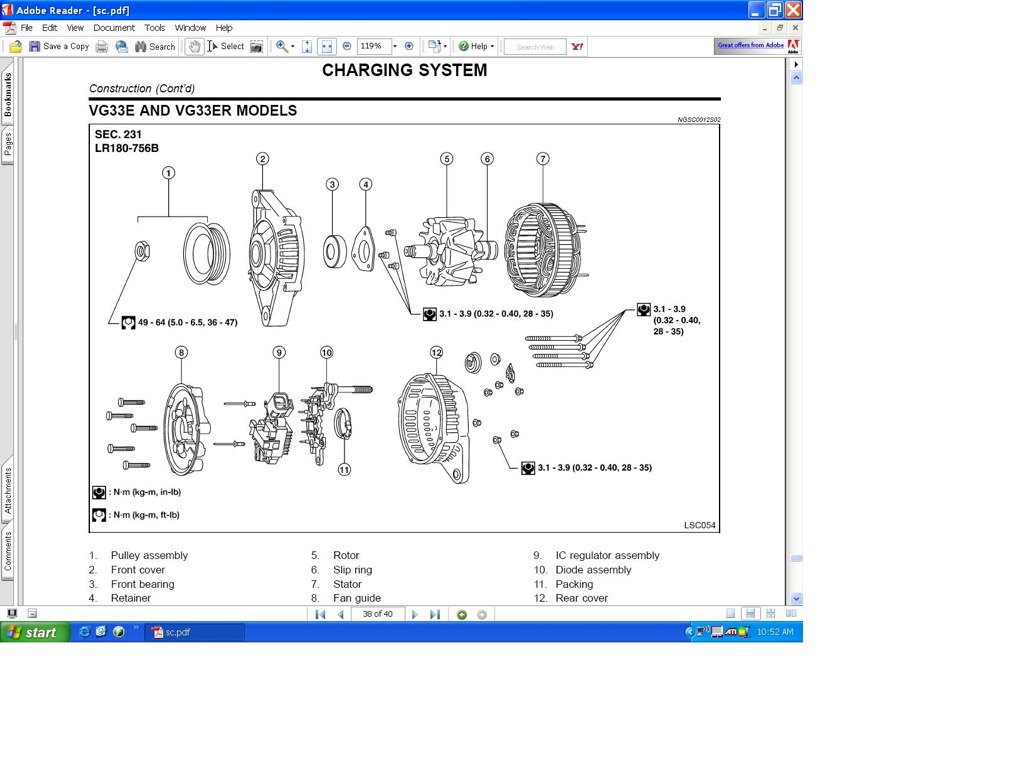
Here is a parts blow up, to help see how it all goes together, etc:
Enjoy!

My bud Mikkaa did the write up several years ago, after he and I did a whole slew of alternators on one ECXC, maybe in 2005 or so.